
Wherobots’ integration with Amazon Simple Storage Service (S3) lets you use Wherobots as the spatial engine that operates on your data while the data stays in your own Amazon S3 buckets. Accelerate your creation of spatial data products by working with data directly from Amazon S3 public or private buckets, bypassing the need for time-consuming data transfers. A guided workflow in Wherobots Cloud creates the integration for you: it generates pre-filled AWS CloudFormation templates that provision the AWS resources Wherobots needs, so you never have to hand-write IAM policies or trust relationships.

How it works

Cloud Connections and storage integrations

Prerequisites

What you need before starting

Create an integration

The step-by-step wizard

Benefits

The S3 storage integration provides the following benefits:
Integrating your S3 buckets lets Wherobots Organization members work with data stored in Amazon S3 without manually transferring or duplicating it.
A wizard walks Admins through the integration and hands you pre-filled CloudFormation templates — no manual IAM policy editing required.
A single Cloud Connection (the credential Wherobots uses to reach your account) can back multiple storage integrations.
Wherobots accesses your account through cross-account IAM role assumption with attribute-based access control (ABAC) — no long-lived access keys are shared.
Choose Read or Read & Write access per integration.
Wherobots’ S3 integration supports Amazon S3 Requester Pays buckets. For more information, see Using Requester Pays buckets for storage transfers and usage in the Amazon S3 documentation.

How it works

An S3 storage integration is built from two pieces, each provisioned by its own pre-filled CloudFormation stack in your AWS account:

Cloud Connection (the trust relationship)

A Cloud Connection is the reusable IAM role Wherobots assumes to reach your AWS account — one connection can back multiple storage integrations and Glue catalogs. It’s created by a wherobots-connection-<name> CloudFormation stack.See Cloud Connections for the full definition and when to create one.
The storage integration grants a Cloud Connection access to a specific S3 bucket (or a prefix within it). A second CloudFormation stack attaches a policy to the connection role.A Read & Write grant includes the multipart-upload support required by Spark and Iceberg, which enables Managed Catalogs.
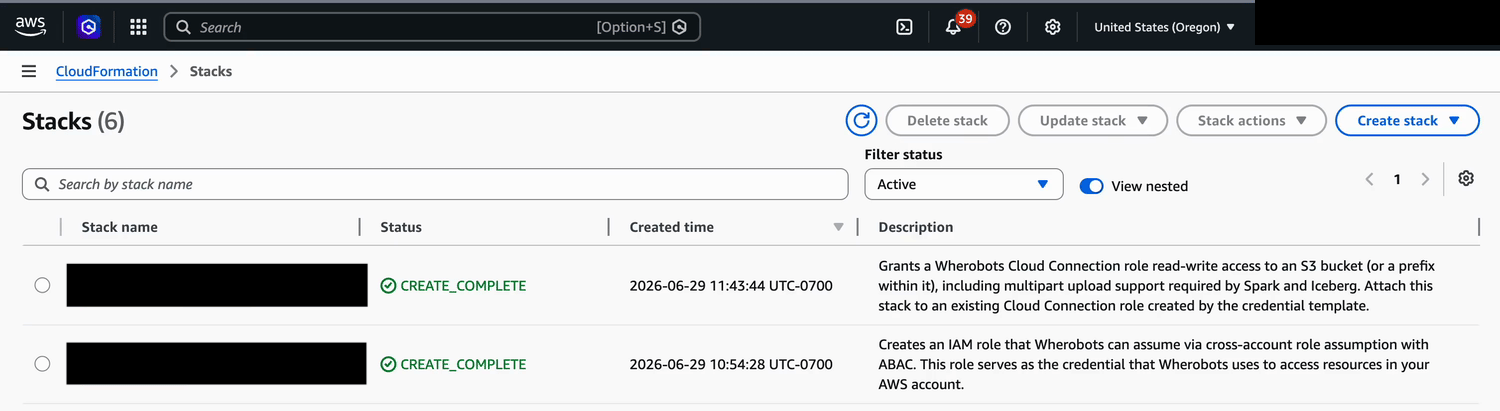
Two CloudFormation stacks — a Wherobots connection stack and a storage read-write stack — both showing CREATE_COMPLETE
Public buckets skip the Cloud Connection. When you point the wizard at a publicly accessible bucket, Wherobots can read it without assuming a role, so the connection step is skipped. A Cloud Connection is required for both private bucket and requester pays buckets.

Cloud Connections

A Cloud Connection is a single, reusable trust relationship between your Wherobots Organization and a cloud provider account. For AWS, it’s a first-class object that stores your AWS account ID and an IAM role (with an external ID) that Wherobots assumes on your behalf to access resources in your account.
Create one Cloud Connection per AWS account and reuse it across all of your S3 storage integrations and AWS Glue catalogs in that account, instead of configuring credentials separately for each one.
Trust is established with AWS CloudFormation. Create the connection directly in the Wherobots UI, or download the CloudFormation template (YAML) so your security team can review it before deploying.

Manage Cloud Connections

Cloud Connections live in Organization Settings under Cloud Connections, where Admins can create, list, verify, and delete them.
  • Verify: Confirms Wherobots can assume your IAM role through the two-hop AWS STS AssumeRole chain.
  • Delete: Blocked while any storage integration or Glue catalog is still bound to the connection. You must remove any resources bound to that Cloud Connection prior to its deletion.

Before you start

The following requirements must be met within both your Wherobots Organization and AWS account before creating an S3 storage integration:
  • An Admin account within a Professional, Innovation, or Enterprise Edition Organization.
    Wherobots Organization members with the User role can use existing integrations set up by Admins but cannot create new ones. See Organization Roles.
  • Community Edition is not supported. See Organization Editions or Upgrade Organization.
  • An AWS account.
  • Permission to create CloudFormation stacks that provision IAM resources in that account (typically AdministratorAccess). CloudFormation creates the IAM role and policies for you, so you don’t edit them by hand.
    The pre-filled templates create or modify IAM resources on your behalf. The actions they perform typically require AdministratorAccess:
    IAM ActionDescription
    CreateRoleCreates the Cloud Connection IAM role
    UpdateAssumeRolePolicySets the trust policy that lets Wherobots assume the role
    PutRolePolicyAttaches the inline policy granting bucket access
    AttachRolePolicyAttaches a managed policy to the role
    DeleteRolePolicyRemoves an inline policy (on stack update or delete)
    DetachRolePolicyDetaches a managed policy (on stack update or delete)
    For a complete list of IAM Actions, see Actions defined by AWS Identity and Access Management in the AWS Documentation.
  • An existing public or private AWS S3 bucket.

Bucket types

The following Amazon S3 bucket types can be integrated with Wherobots:
A public bucket on Amazon S3 is a bucket that has turned off Amazon S3’s default Block all public access option. Public buckets can be read without a Cloud Connection.
Granting external write access to a public S3 bucket is strongly discouraged. Use a private bucket for Managed Catalogs.
A private bucket on Amazon S3 is a bucket that keeps the default Block all public access option enabled. Private buckets require a Cloud Connection. This is the recommended option for Managed Catalogs.
In Amazon S3, a Requester Pays bucket shifts the responsibility for the cost of the request and the data download from the bucket owner to the person accessing the data.
Additional fees applyAccessing data from Requester Pays buckets will result in additional fees charged to you, not the bucket owner.
For more information on Amazon S3 buckets, see Creating a bucket in the Amazon S3 documentation.

Create a storage integration

On the Wherobots Hosted platform, follow the wizard below as-is — the integration is available to Wherobots Cloud compute automatically.
This workflow switches between Wherobots Cloud and the AWS Console. Each time you launch a CloudFormation stack, Wherobots opens the AWS Console in a new tab with every parameter pre-filled — you only need to acknowledge and create the stack, then return to Wherobots.
S3 Path Restriction: Bucket paths cannot contain periods. For example, s3://my.bucket.name is not allowed. Acceptable paths can consist of alphanumeric characters, underscores, equal signs, and dashes.
1

Start the integration

  1. Log in to Wherobots Cloud and click Storage in the left sidebar.
  2. Click Create Storage Integration.
The Wherobots Cloud Storage page with the Create Storage Integration button highlighted
2

Enter the integration details

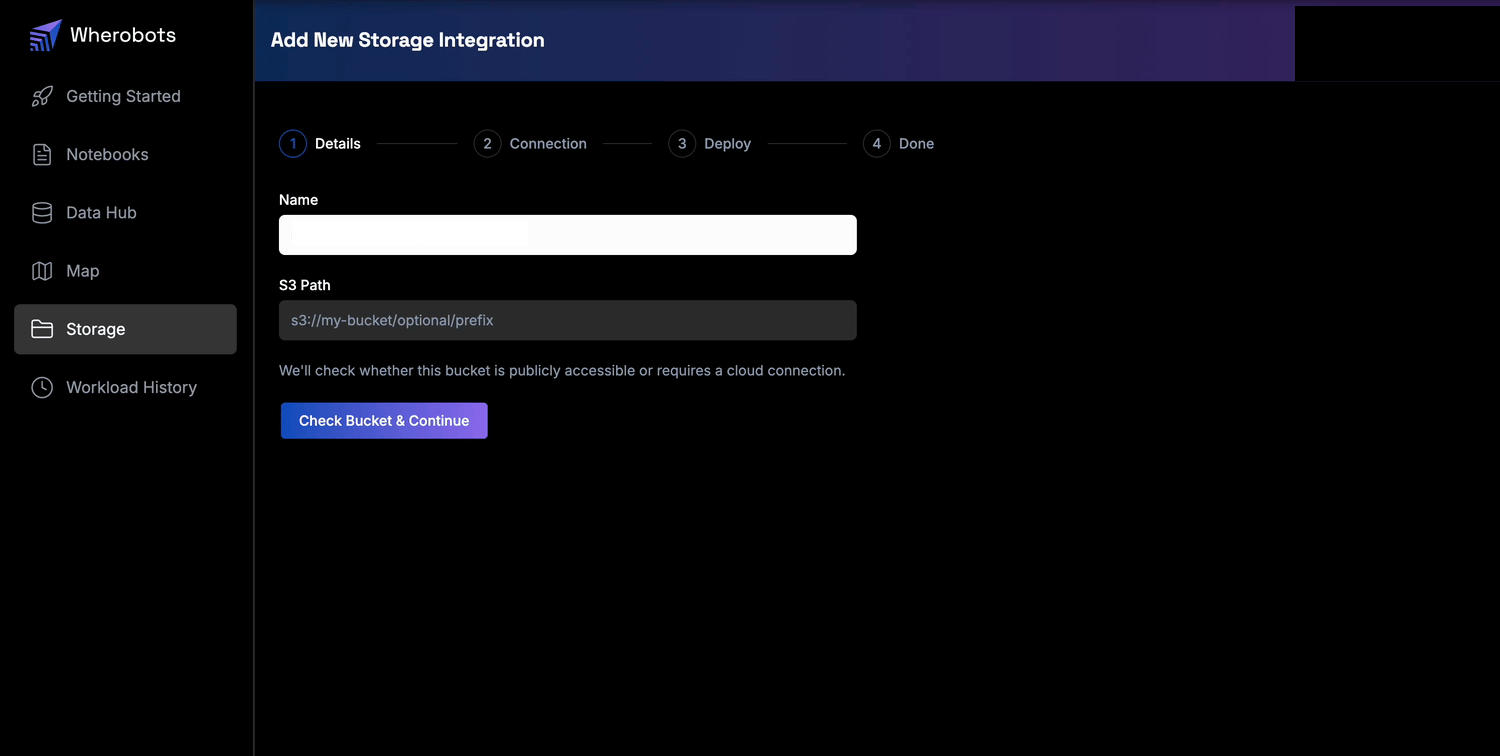
On the Details step, enter:
  • Name — a name for this integration (must include at least one letter).
  • S3 Path — your bucket path, optionally with a prefix, prefaced by s3:// (for example, s3://my-bucket or s3://my-bucket/optional/prefix).
Click Check Bucket & Continue. Wherobots checks whether the bucket is publicly accessible or requires a Cloud Connection.
The Details step of the Add New Storage Integration wizard, with Name and S3 Path fields
If the bucket is public, the wizard skips the Connection step and takes you straight to Deploy.
3

Choose or create a Cloud Connection

For a private bucket, the Connection step asks you to pick an existing Cloud Connection or create a new one.
Only Admins can create Cloud Connections. If you don’t have permission, ask your Admin to create one for you.
  • Reuse a connection: Select an existing connection from the dropdown, then continue to the next step.
  • Create a connection: Select Create new connection and follow the steps below.

Create a new Cloud Connection

Creating a connection takes two steps inside the Create Cloud Connection dialog.
1

Enter the connection details

  • Connection Name — a label that identifies the trust relationship in Wherobots.
  • AWS Account ID — the 12-digit AWS account you’re connecting to.
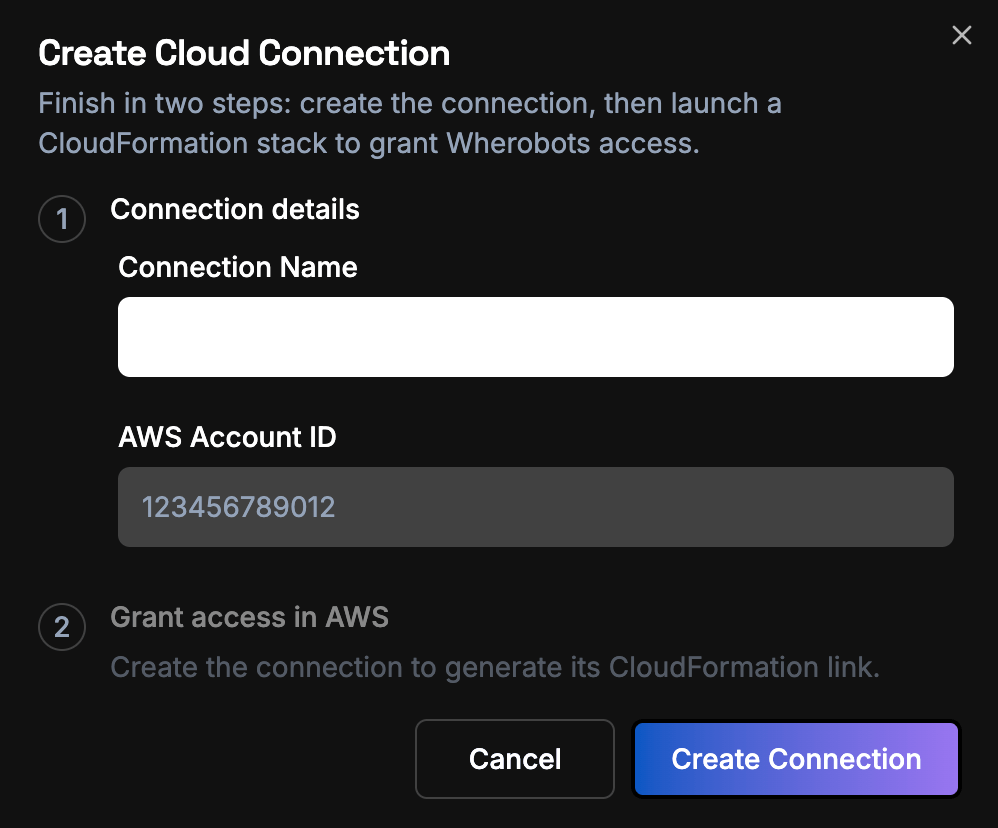
Click Create Connection.
The Create Cloud Connection dialog
2

Grant access in AWS

Wherobots generates a pre-filled CloudFormation stack (named wherobots-connection-<name>) that creates the connection’s IAM role. Click Open in AWS Console to launch it in a new tab, or Download Template to run it yourself.
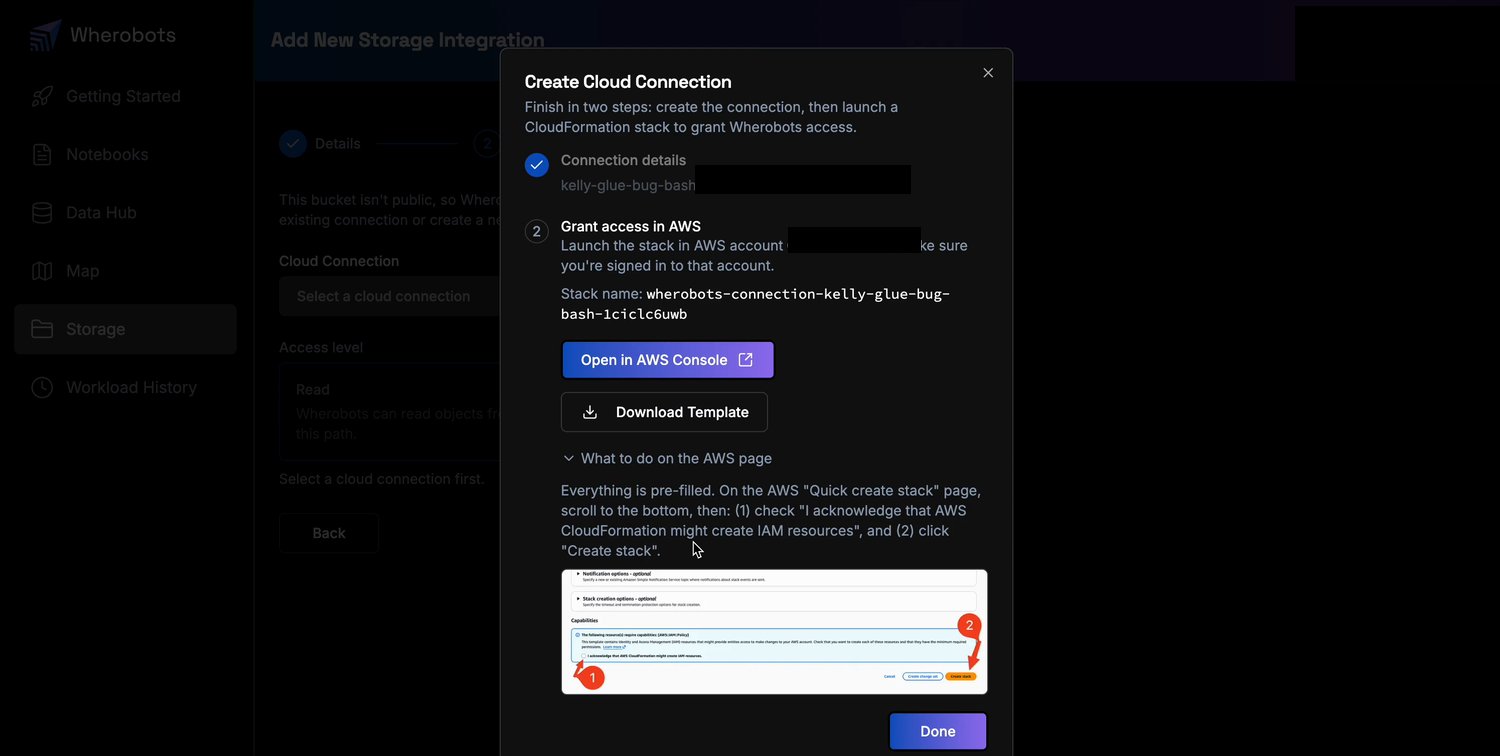
The Grant access in AWS step of the Create Cloud Connection dialog, with Open in AWS Console and Download Template buttons
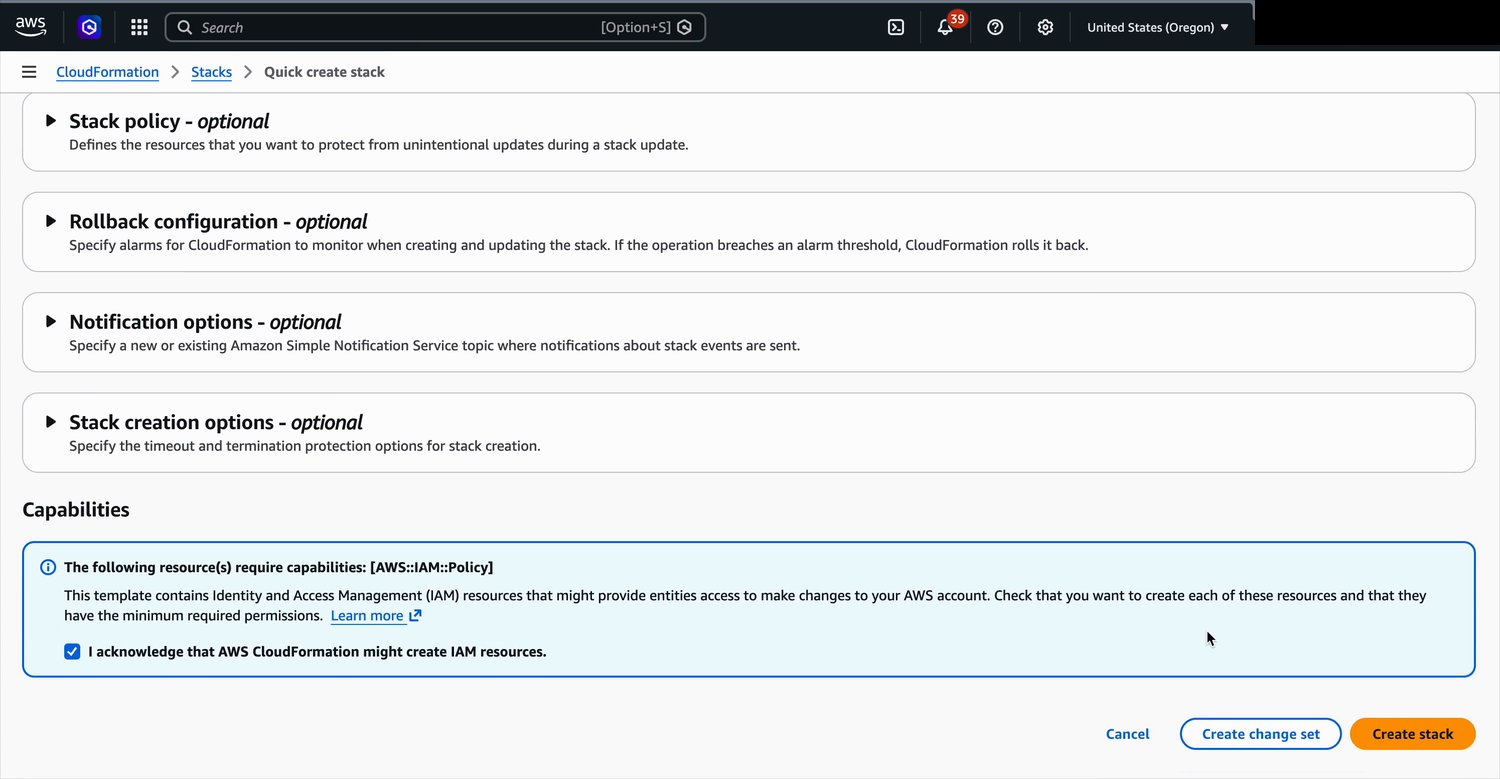
On the AWS Quick create stack page, everything is pre-filled. Scroll to the bottom, select I acknowledge that AWS CloudFormation might create IAM resources, and click Create stack.
The Capabilities section of the AWS Quick create stack page with the IAM acknowledgment checkbox selected
Back in Wherobots, click Done to finish creating the connection.
4

Choose an access level

With a connection selected, choose how much access Wherobots should have to this path:
  • Read: Wherobots can read objects from this path.
  • Read & Write: Wherobots can read and write objects, enabling Managed Catalogs.
Click Continue.
5

Deploy the storage stack

On the Deploy step, launch the second CloudFormation stack (named wherobots-storage-readonly-<bucket> or wherobots-storage-readwrite-<bucket>). This grants the connection access to your bucket. The parameters are pre-filled.
  1. Click Open in AWS Console (or Download Template).
  2. On the AWS Quick create stack page, select I acknowledge that AWS CloudFormation might create IAM resources, and click Create stack.
  3. Return to Wherobots and click Create integration.
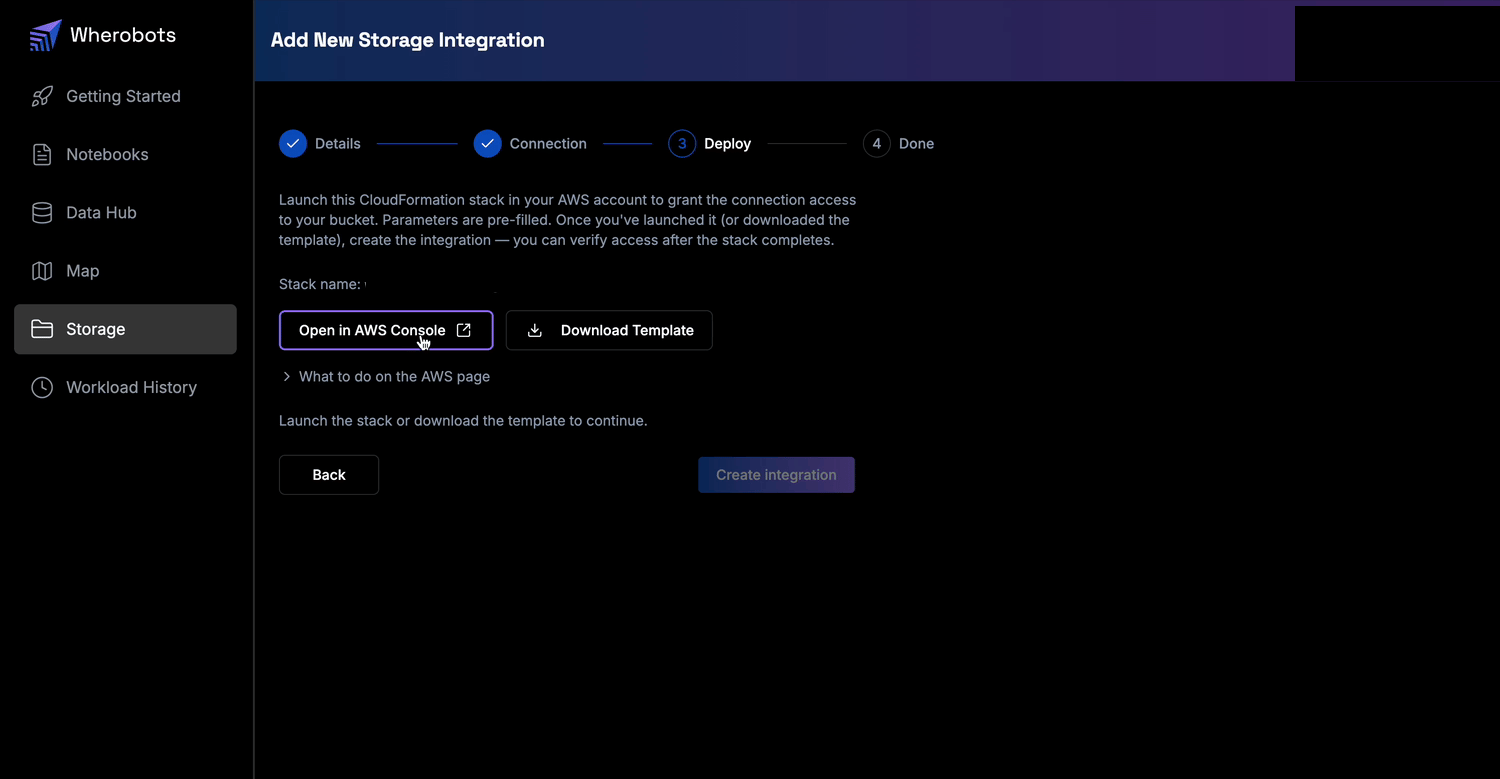
The Deploy step of the wizard, with Open in AWS Console, Download Template, and Create integration buttons
6

Verify access

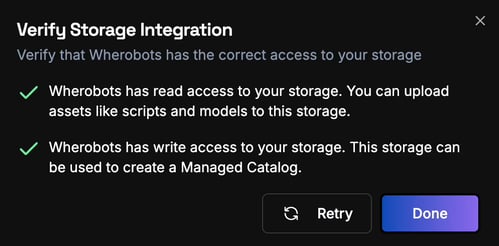
On the Done step, Wherobots confirms the integration was created. After your CloudFormation stack finishes, click Verify Access.Wherobots checks read access — and, for a Read & Write integration, write access. When the checks pass, click Done.
The Verify Storage Integration dialog showing successful read and write access checks
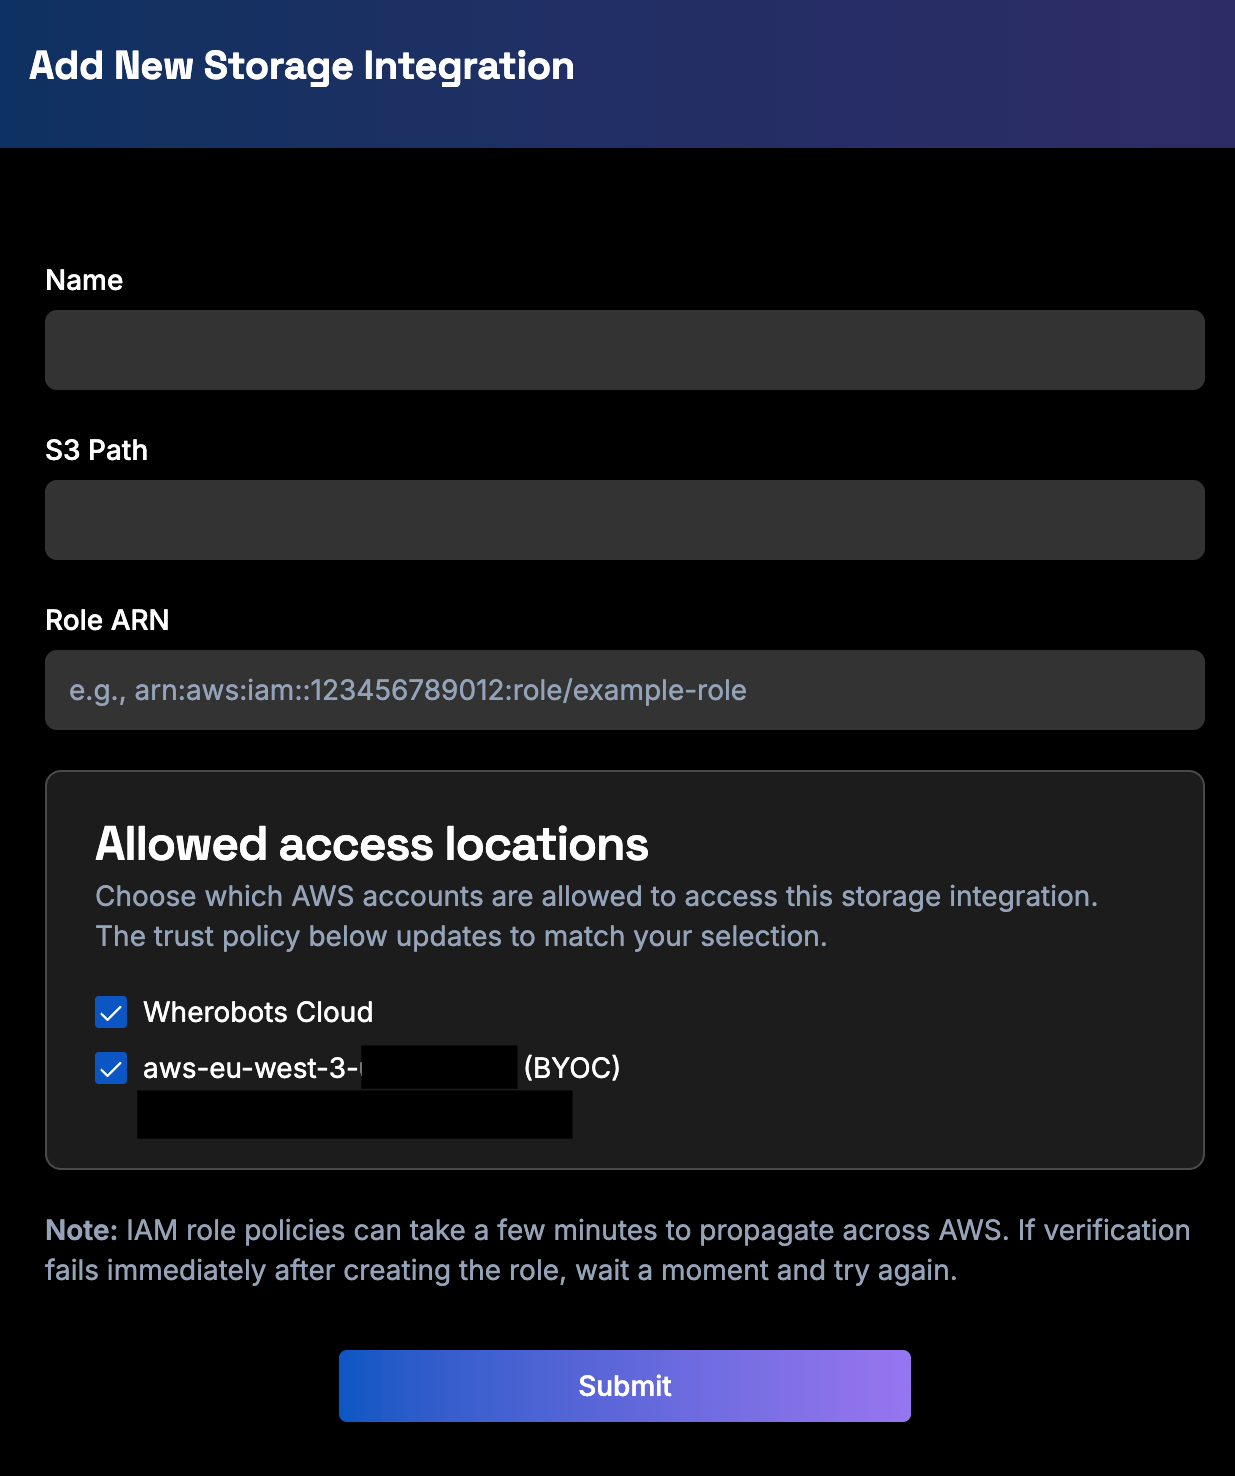
IAM role policies can take a few minutes to propagate across AWS. If verification fails immediately after creating the stack, wait a moment and click Retry.
A storage integration is not a catalog. Creating a storage integration connects Wherobots to your S3 bucket, but it doesn’t expose your data as a queryable catalog. To query the data, create a catalog from the bucket in the Data Hub: click Add Catalog, then choose your storage under Catalog in. See Create a Managed Catalog.

Manage storage integrations

After creating S3 storage integrations, Admins can manage them from Organization Settings.
To re-verify an integration, go to Organization Settings > Storage, click … (the ellipsis button) > Verify Access.
To view all storage integrations, see Organization Settings > Storage.
To delete an integration, go to Organization Settings > Storage, click … (the ellipsis button) > Delete.

View a specific integration’s contents

1

Open Storage

Log in to Wherobots Cloud and click Storage in the left sidebar.
2

Select your storage source

Click the storage source selector at the top of the page (shows Managed by default) and select your integrated bucket from the dropdown.
3

Browse your files

Navigate through the folder structure to view your bucket’s contents.

Access integrated storage in a notebook

After creating a Managed Catalog from your S3 storage integration, access your data using the catalog reference format:
CATALOG_NAME.DATABASE_NAME.TABLE_NAME
To use new storage integrations or catalogs in your notebooks, you must start a new runtime. Notebooks can only access integrations created before the runtime started.
1

Start a notebook

Log in to Wherobots Cloud and start a Notebook with a Python Kernel. See Notebook instance management and Jupyter Notebook Management for details.
2

Load your data from the catalog

# Replace `CATALOG_NAME`, `DATABASE_NAME`, and `TABLE_NAME` with your specific names.

from sedona.spark import *

config = SedonaContext.builder().getOrCreate()
sedona = SedonaContext.create(config)

# Access data using catalog.database.table format
df = sedona.table("CATALOG_NAME.DATABASE_NAME.TABLE_NAME")
df.printSchema()
df.show()
# Replace `CATALOG_NAME`, `DATABASE_NAME`, and `TABLE_NAME` with your specific names.
from sedona.spark import *

config = SedonaContext.builder().getOrCreate()
sedona = SedonaContext.create(config)

# Access data using catalog.database.table format
df = sedona.sql("SELECT * FROM CATALOG_NAME.DATABASE_NAME.TABLE_NAME")
df.show()

Managed Catalog

A Managed Catalog can be created from a Read & Write private bucket storage integration at any time, allowing for multiple catalogs per integration.
Use private buckets for Managed CatalogsGranting external write access to a public S3 bucket is strongly discouraged. Use a private S3 bucket for your Managed Catalog.

What is a Managed Catalog?

A Managed Catalog is a metadata repository that is created, owned, and controlled directly within your Wherobots Organization. When you connect a data source like an S3 bucket and register it as a managed catalog, Wherobots takes on the following responsibilities:
Wherobots becomes the authoritative source for all metadata, including schemas, table definitions, file locations, and partition information.
Wherobots actively scans the underlying storage (e.g., S3) to discover new data and automatically update the catalog.
Wherobots handles all metadata operations, such as creating, updating, and deleting tables. Changes in the underlying data are automatically synced to the catalog.
Because Wherobots has full control, it can build and manage advanced spatial indexes and perform other performance optimizations directly on the metadata.
You typically use a managed catalog when your raw spatial data files reside in an AWS S3 private bucket and you want Wherobots to handle all aspects of data management, query optimization, and spatial ETL.

Create a Managed Catalog from an S3 bucket

To create a Managed Catalog from an S3 bucket storage integration, complete the following steps:
1

Open Data Hub

Log in to Wherobots Cloud and click Data Hub.
2

Add a new catalog

Click Add Catalog.
3

Configure the catalog

  • Name: Alphanumeric characters, spaces, special characters, or underscores (must include at least one letter). No dashes or periods allowed.
  • Path (Optional): Enter the sub-folder where you’d like to store this Managed Catalog
Runtime Restart Required After Data IntegrationTo use new storage integrations or catalogs in your notebooks, you must start a new runtime. Notebooks can only access storage integrations or catalogs that were created before the runtime started.

Limitations

The following limitations apply to S3 storage integrations:

Current limitations

  • Bucket paths cannot contain periods (e.g., s3://my.bucket.name is not allowed)
  • A bucket can only be configured with a single storage integration
  • Public buckets are read-only and cannot be used for Managed Catalogs due to the write access requirements
  • Creating an integration requires permission to deploy CloudFormation stacks that provision IAM resources in your AWS account