Quickstart
Already familiar with adding MCP servers? Take a look at the Quickstart.Quickstart
Quickstart
- VS Code Extension
- Manual Configuration
- Run the following command to install the extension, or click Install from the VS Code Extensions Marketplace:
- In VS Code, open the Command Palette (
Cmd+Shift+Pon Mac,Ctrl+Shift+Pon Windows/Linux). - Enter
Wherobots: Set API Key. - Enter your Wherobots API key.
- The extension automatically configures the MCP server. Verify by typing
Wherobotsin the Command Palette — you should see commands likeCreate Workspace,Submit Job, andOpen Settings.
Benefits
The MCP Server integration in Wherobots Cloud allows for:- Intelligent Catalog Exploration: Discover and understand the schemas of your available datasets through natural language queries
- Geospatial Query Generation: Generate Spatial SQL queries using natural language
- Conversational Exploration: Query your spatial catalog with natural language to speed up preliminary data analysis.
Watch a 10-minute demo
Before you start
Before using this feature, ensure that you have the following required resources:-
An Account within a Professional or Enterprise Organization. For more information, see Create a Wherobots Account.
- Both Admin and User roles have access to MCP Server in Wherobots Cloud.
-
A Wherobots API key. For more information, see API Keys.
Using the MCP Server with advanced AI models like Claude Sonnet 4 or GPT-4 is recommended for optimal performance.
Enable Wherobots MCP server in VS Code
- VS Code Extension
- Manual Configuration
The Spatial AI Coding Assistant by Wherobots VS Code extension automatically configures the Wherobots MCP server for you. Installing the extension gives you the MCP server along with access to running local notebooks against Wherobots Runtime Compute and job submission.
Install the extension
Install the extension from the VS Code Extensions Marketplace, or run the following command:Configure the extension
After installation, set your API key to connect to Wherobots Cloud.Enter
Wherobots: Set API Key and enter your Wherobots API key when prompted.If you haven’t created an API key yet, enter Wherobots: Generate API Key on Wherobots Cloud to create an API key within the Wherobots Cloud UI.API keys are stored securely in VS Code Secret Storage. The extension connects to the Wherobots Cloud
production API by default. To use a custom API endpoint, set the
wherobotsjobsubmit.apiBaseUrl
setting in VS Code Settings.Verify the installation
To confirm the extension is installed and configured correctly:The extension automatically configures the MCP server in VS Code with no additional manual configuration required.For more details on the extension’s full capabilities, see Install the Spatial AI Coding Assistant.
Use the MCP server
- Open the GitHub Copilot Chat view. To do this, click View > Chat from the VS Code menu bar on your Mac or Windows/Linux system.
-
If you haven’t already, click New Chat (
Cmd+Non Mac orCtrl+Non Windows/Linux) button to start a new chat session. -
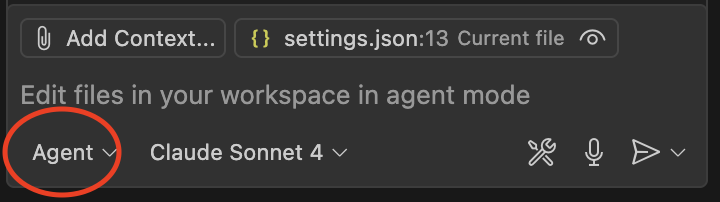
Make sure you have Agent selected as the chat mode. You can select this from the dropdown menu at the top of the chat panel.

- You can also select the model you wish to use alongside the MCP server from the adjacent dropdown. Quality of responses may vary between models.
-
Ask a question to see if it interacts with the Wherobots service, for example:
Show me the catalogs in my Organization
-
If successful, Copilot will confirm it is using the Wherobots MCP server (showing
Ran list_catalogsor a similar tool) and display all of the available catalogs in your Organization. The exact response will vary depending on the datasets within your Organization as well as the model used to query the MCP server.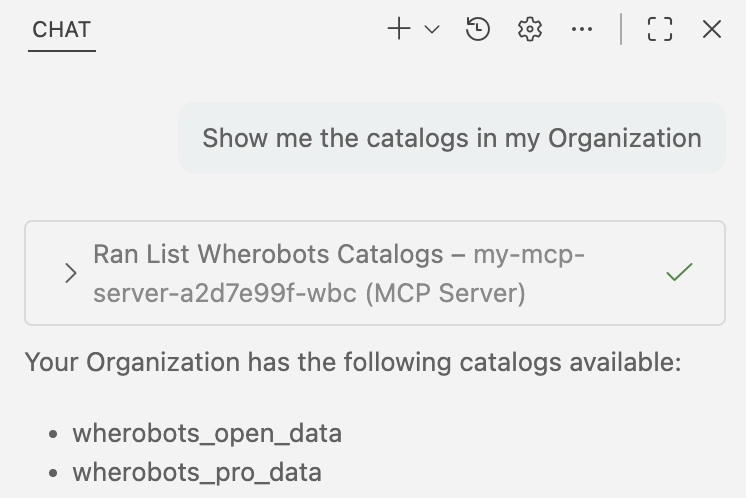
wherobots_open_dataappears for Community Edition, and bothwherobots_open_dataandwherobots_pro_datafor Professional and Enterprise Edition Organizations.
Stop the MCP server
When you are finished asking Wherobots-related questions, it is important to stop the MCP server. Stopping the server ensures that no additional charges are incurred from the MCP server and that resources are freed for other tasks.To stop the MCP server in VS Code:- Open the Command Palette (
Cmd+Shift+Pon Mac,Ctrl+Shift+Pon Windows/Linux). - Type and select MCP: List Servers.
- Select the name of your server from the list.
- Click Stop Server.
Enable the Wherobots MCP server in other tools
OpenCode
If you have OpenCode enabled, complete the following steps to enable the Wherobots MCP server.- In your terminal, run
opencode mcp add - Configure the following settings:
- MCP server name:
<YOUR_SERVER_NAME> - MCP server type:
Remote - MCP server URL:
https://api.cloud.wherobots.com/mcp/ - OAuth authentication:
No
- MCP server name:
- Set the WHEROBOTS_API_KEY environment variable to the API key you created earlier
- If you need the API key persisted across sessions, you can add
export WHEROBOTS_API_KEY=<YOUR_API_KEY>to your shell profile (e.g., ~/.bashrc or ~/.zshrc on Mac or Linux).
- If you need the API key persisted across sessions, you can add
- Restart OpenCode
- Ask a question to verify that the MCP server is working, for example:
Show me the catalogs in my Organization
- If configured correctly, OpenCode will call the Wherobots MCP server (showing a tool such as
list_catalogs) and return the catalogs available in your Organization
OpenCode requires using a modern terminal emulator for the most optimal experience.
Claude Code
- In a terminal, run the following command after replacing the placeholder server name and API key with your own:
- Restart Claude Code
- Ask a question to verify the MCP server is working, for example:
Show me the catalogs in my Organization
- If configured correctly, Claude Code will call the Wherobots MCP server (showing a tool such as
list_catalogs) and return the catalogs available in your Organization
For more information on downloading, installing and using Claude Code, see Claude Code overview
and Quickstart in the Claude Code Documentation.
Next steps and best practices
The MCP server excels at helping you understand and work with your spatial data. Use natural language prompts to explore datasets, assess data quality, and generate spatial SQL queries. Start by asking questions about your catalogs or datasets to see how the MCP server can assist you in your geospatial analysis tasks.- For more information on using the MCP Server including common tasks, example prompts, and cost considerations see MCP Server Best Practices and Usage.
- For a video walkthrough of the MCP server in action, see Video: Automating Geospatial Discovery and Query Generation.