

Wherobots-GL is the visualization tool built into Wherobots. It loads spatial data by URL and appears in two places, backed by the same renderer:
- The Map section in Wherobots Cloud.
- The inline
Mapwidget in Wherobots notebooks, from the preinstalledwherobots_glpackage.
What you map, and when
A RasterFlow workflow produces three artifacts that you can visualize and inspect with Wherobots-GL:
Visualization allows you to quickly see a mosaic is missing a tile, a cloud mask that dropped half a scene, a season that produced bare fields instead of crops, or a threshold that kept every marginal pixel.
Checking the mosaic first is also a cost control. Mosaicking and inference are billed as separate RasterFlow Tasks, so catching a bad mosaic before you run a model over it saves the RasterFlow Spatial Units of the inference run, and of everything downstream of it.
Stacking layers is what makes the check work: put the vectorized output over the mosaic it came from, and misaligned or spurious detections stand out immediately.
Add a layer in Wherobots Cloud
Go to Map in the left sidebar of Wherobots Cloud, paste the URL of your output into Layer URL, and select Add Layer. Add more layers to stack them on the same map.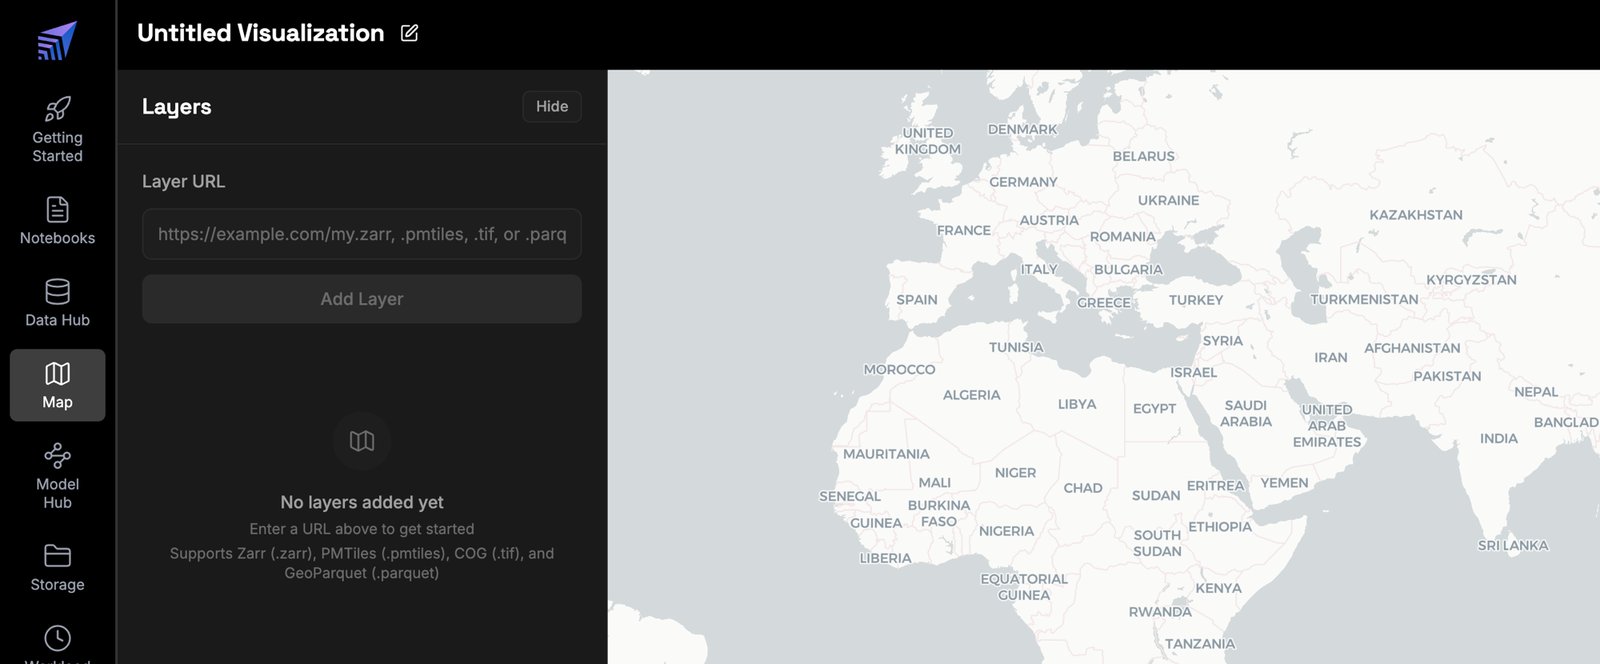
The Map page in Wherobots Cloud, before any layers are added. Paste an output URL into Layer URL and select Add Layer.
Render a map in a notebook
ImportMap and pass it one or more layers. A bare URL string works — the layer type is inferred from the extension — or pass a config dict to set the type and styling explicitly:
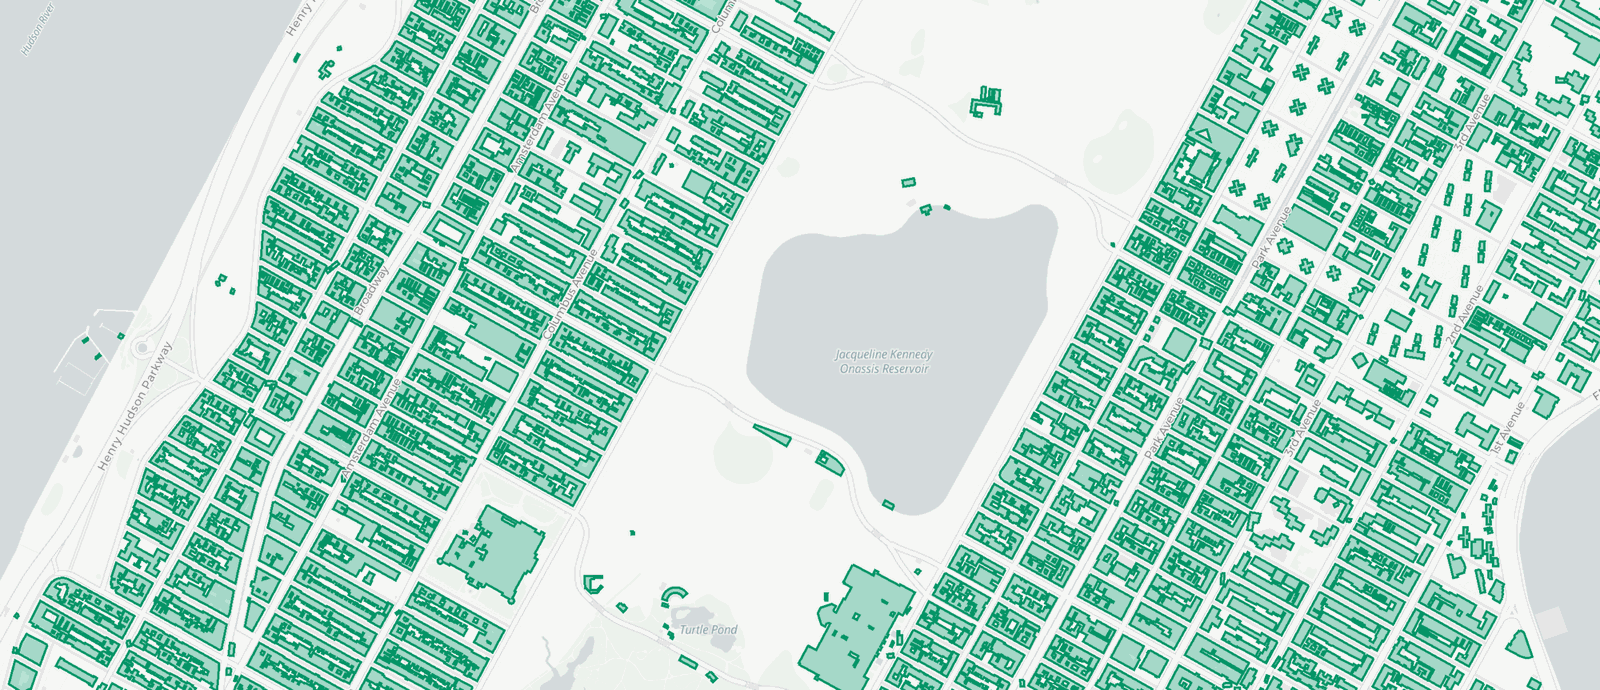
A GeoParquet polygon layer rendered in Wherobots-GL: building footprints drawn over the basemap, so you can see at a glance where features land and where they are missing.
Scope a query to see your visualization
The notebook widget writes its viewport back to the kernel as you pan and zoom. Use it to run a query over exactly the area on screen:m.viewport_bbox and m.viewport_bbox_wkt return the same extent in EPSG:4326, or, World Geodetic System (WGS) 84.
That query works under a few assumptions:
- The table already exists in the session.
to_sql_filter()returns only aWHEREclause, sodetectionshas to be queryable before you run the query. Register your vectorized output as a view first:sedona.read.format("geoparquet").load(vectorized.uri).createOrReplaceTempView("detections"). - The column you name holds geometries. Pass the name of an actual geometry column —
to_sql_filter('geometry')here — not a WKT string column. - That column is in EPSG:4326. The filter is built from the map’s WGS 84 bounds and nothing is reprojected for you, so wrap the column in
ST_Transformfirst if it is stored in another CRS. - The map has rendered and reported its bounds. The viewport travels from the browser back to the kernel, so display the map in one cell and run the query in a later one.
m.viewport_bbox,m.viewport_bbox_wkt, andto_sql_filter()are allNoneuntil that round trip completes. - You are working in a notebook. Viewport scoping needs a live kernel and a rendered widget, so it does not apply to a Job Run.
Where to get the layer URLs
You never construct these URLs yourself. They come from one of two places: the object a RasterFlow call returns, or the workload’s entry in Workload History.From the RasterFlow call
Every RasterFlow call returns an object carrying the URI of what it just wrote, so getting a layer URL means reading one attribute off the value the call already returned, then printing it and pasting it into the map, or passing it straight toMap.
- More than one mosaic store.
first_row_mosaicis only the first store the index references. If your area of interest produced several, readmosaic_index.mosaic_index_gdfand take the URI of each store you want to view. - No features to vectorize.
vectorize_mosaic()still returns aVectorizeOutput, but itsuriisNonewhen the run produced no vector features, so there is nothing to map. - A DataFrame you derived yourself. Nothing returns a URI for it. Write it to GeoParquet first, as shown above, and use the path you passed to
.save().
MosaicResult, UriOutput, and VectorizeOutput, see the Data Models reference.
From Workload History
Every RasterFlow run is recorded in Workload History in Wherobots Cloud, along with the outputs it wrote, so you can find a layer URL after the fact — for a Job Run you submitted, or a notebook session you have since shut down. Go to Workload History in the left sidebar of Wherobots Cloud and select the workload for your RasterFlow run. Its detail view lists what the run wrote under Outputs, and the Visualize n outputs button above that table opens them in the map viewer, so there is no URL to copy by hand.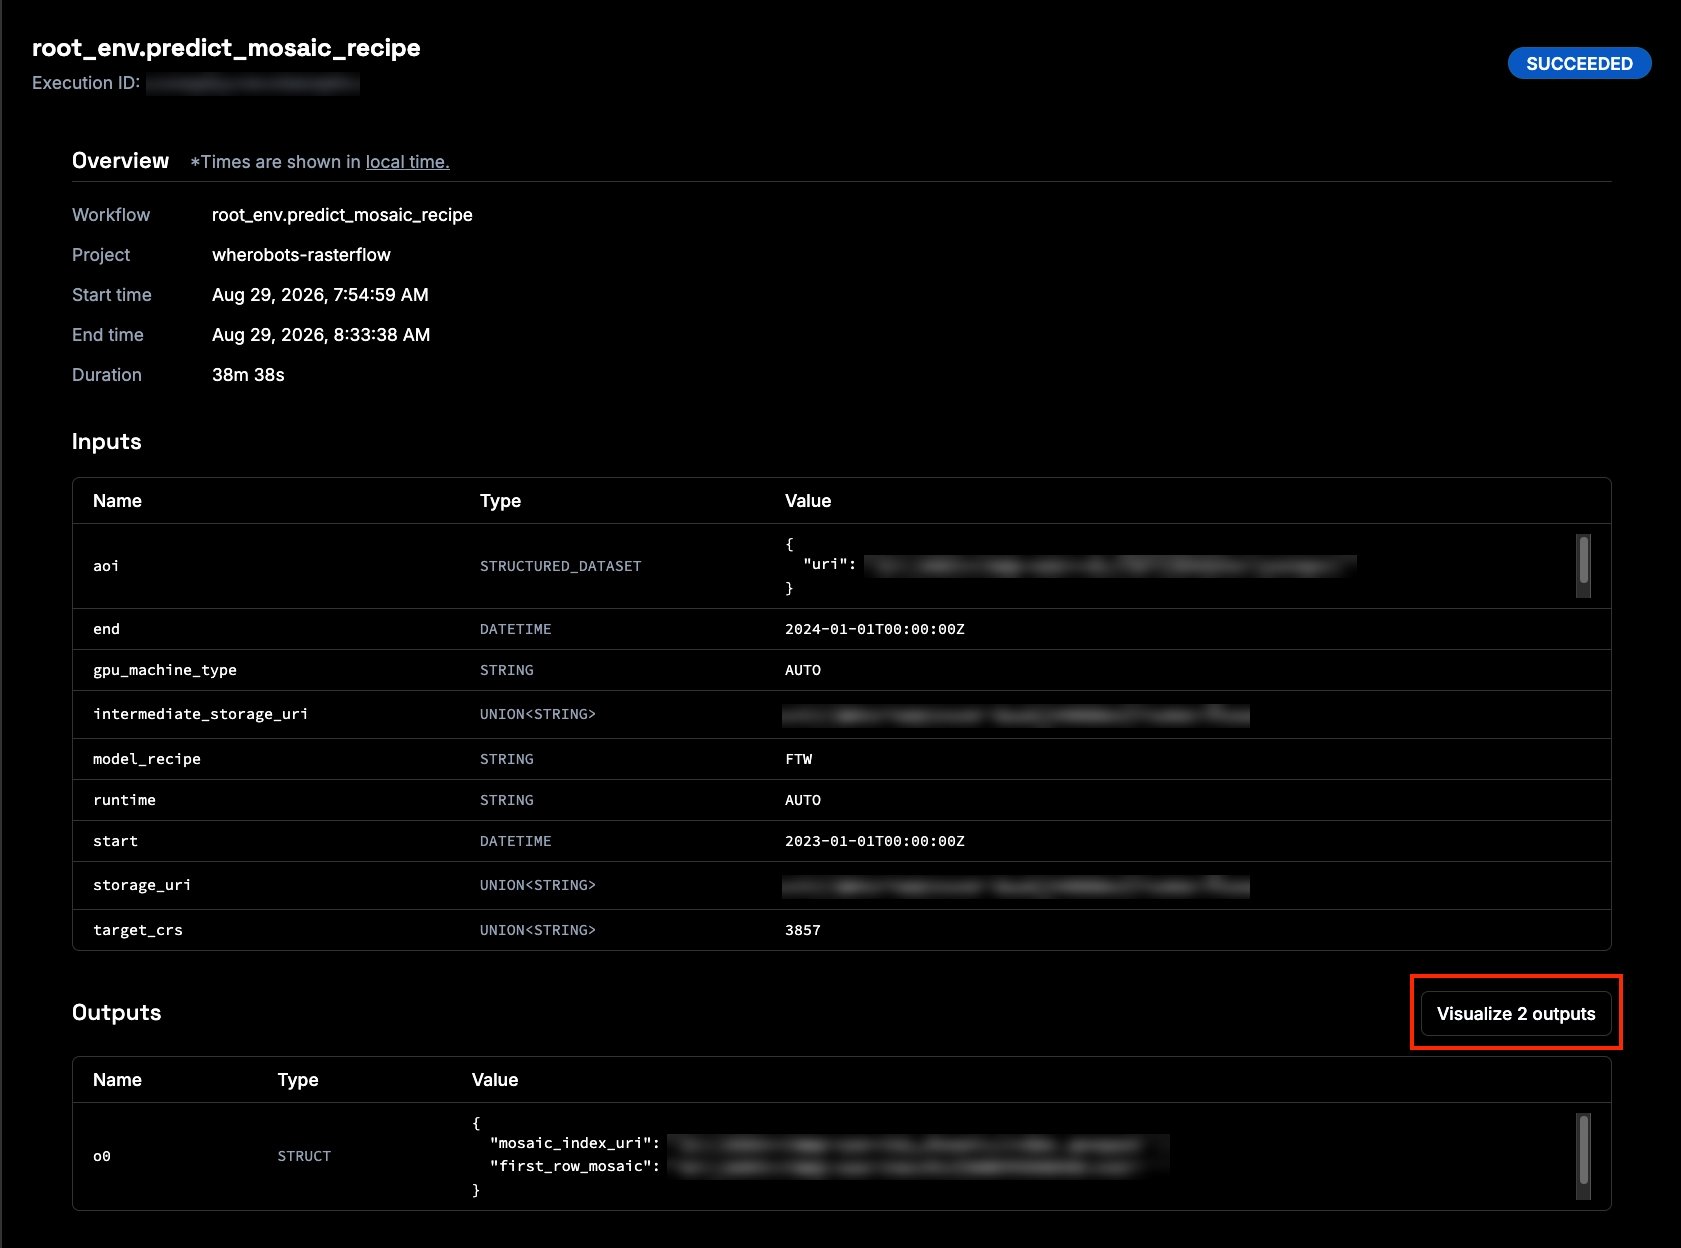
The Outputs section of a completed RasterFlow workload. Select Visualize 2 outputs to open the mosaic index and prediction store in the map viewer.
Public URLs need no further configuration.For a private S3 source, set up a Storage Integration and write your RasterFlow output to that bucket, so access is granted once at the Organization level rather than per notebook. See Use RasterFlow with a Storage Integration.
Next steps
Build Multiscales
Add overview levels so a store pans and zooms smoothly.
Building NAIP mosaics
A complete mosaic build that ends on the map.