Skip to main content This document details how to store your files in Wherobots Managed Storage
Benefits You can store a variety of file formats in Managed Storage, including:
Shapefiles (.shp)
GeoJSON (.geojson)
CSV (.csv)
Parquet (.parquet)
GeoParquet (.parquet)
Raster formats (e.g., .tif, .geotiff)
Once uploaded, your data is readily available for use within the Wherobots Cloud environment, including:
WherobotsDB : Access and query your data using WherobotsDB, leveraging its geospatial capabilities for analysis.Jupyter Notebooks : Within Wherobots Cloud, load and process your data within Jupyter notebooks for interactive exploration and visualization.Wherobots API(s): Programmatically access and manage your data through the Wherobots API(s).
Storage limits Our Managed Storage offering provides different capacities based on your Organization type:
Community Edition: 5 GB total storage for your entire Organization.
Professional & Enterprise Editions: Unlimited storage for your entire Organization.
Before you start Before using Managed Storage, ensure that you have the following required resources:
An account within a Community, Professional, or Enterprise Edition Wherobots Organization. For more information, see Create a Wherobots Account
Upload your data You can upload data through the Wherobots Cloud web interface or the Amazon Web Services (AWS) CLI.
Web interface
Log in to Wherobots Cloud .
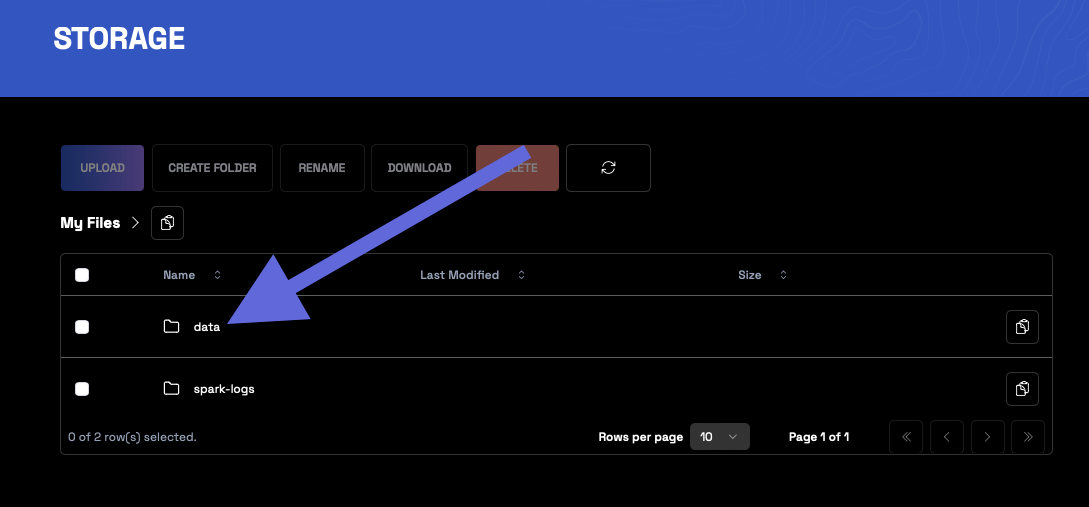
Go to Storage
Click data .
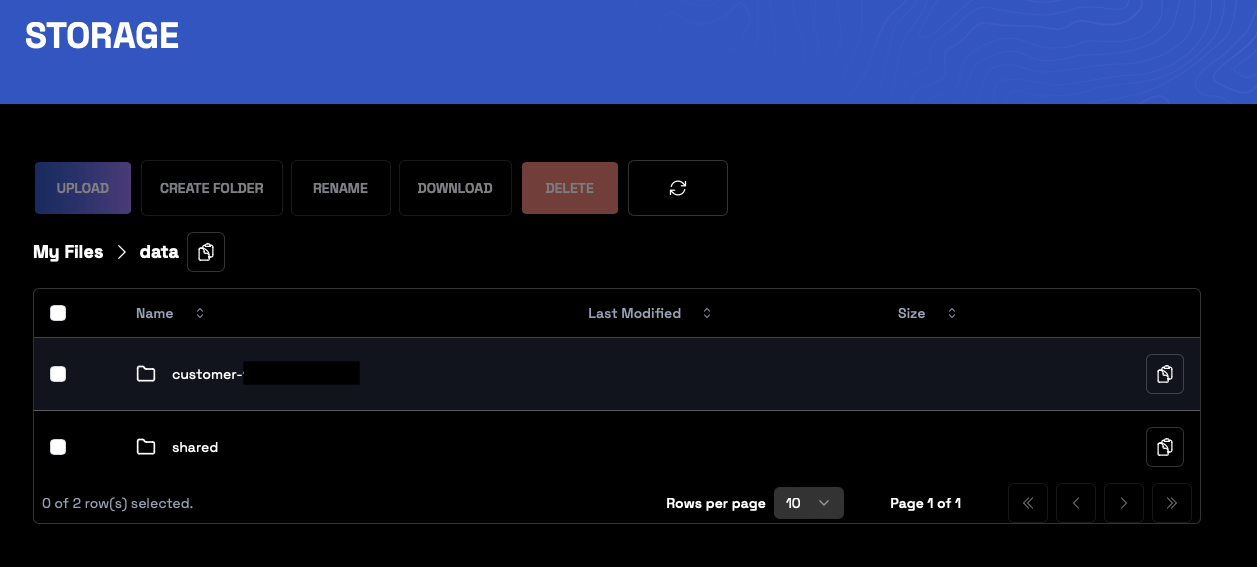
Navigate to your customer- folder or the shared folder.
shared storage visibilityItems stored in the shared folder are available to your entire Wherobots Organization. For more information, see Wherobots File System .
(Optional) Click Create folder , to create a new folder.
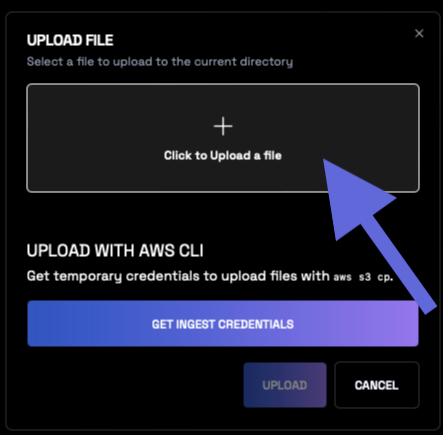
Click Upload .
Click + Click to Upload a file to open the file browser.
Select your desired file.
Click Upload .
AWS CLI For larger datasets or bulk uploads, leverage the AWS CLI, which allows you to upload to Managed Storage with AWS CLI.
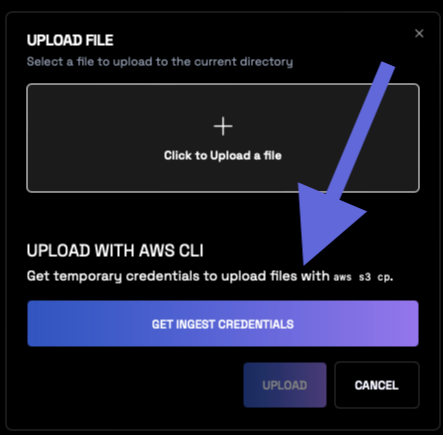
Follow these instructions, to obtain temporary ingest credentials and upload files with aws s3 cp.
Generate temporary ingest credentials through the web interface.
Go to Storage
Click data .
Navigate to your customer- folder or the shared folder.
Note Items stored in the shared folder are available to your entire Organization. For more information, see Wherobots File System .
(Optional) Click Create folder , to create a new folder.
Click Upload .
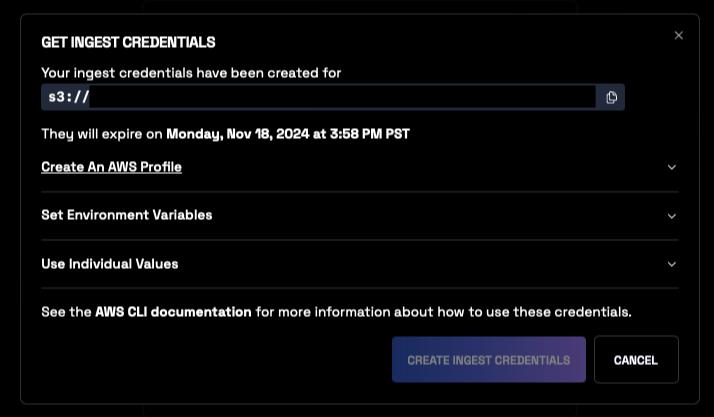
Click Get ingest credentials .
Click Create ingest credentials to generate credentials.
Configure your AWS CLI with these credentials. For more information, see Authenticating with short-term credentials for the AWS CLI in the AWS documentation.
After authenticating successfully, you can use the aws s3 cp to upload your data to the provided S3 URL. 