> ## Documentation Index
> Fetch the complete documentation index at: https://docs.wherobots.com/llms.txt
> Use this file to discover all available pages before exploring further.
# Query Amazon S3 Tables Catalog in a Notebook
> Start a new runtime and query Amazon S3 Tables catalog tables from a Wherobots notebook.
After you connect your S3 table bucket in Data Hub, its namespaces and tables appear in the [**Data Hub**](https://cloud.wherobots.com/data-hub) alongside your other catalogs. You can reference its tables from a notebook using the catalog name you chose.
## Before you start
The following requirements must be met before you can query an S3 Tables catalog in a Wherobots Jupyter Notebook.
* An **Admin** or **User** Wherobots account within a **Professional**, **Innovation**, or **Enterprise** Organization Edition. For more information, see [Organization Editions](/get-started/organization-management/organization-editions).
Only Admins can *create* S3 Tables catalog connections but a User can query the tables bound to those Connections. If you are not an Admin, ask your Admin to create a Cloud Connection for you.
* An existing S3 Tables catalog connection in Data Hub, or permission to create one. For more information on creating an S3 Tables catalog connection, see [Connect to Amazon S3 Tables Catalog](/get-started/initial-storage/aws/connect-to-s3-tables-catalog).
* To create or modify tables, the catalog must have been connected with **Read-write** access. A **Read-only** catalog can be queried but not written to.
A runtime only sees storage integrations and catalogs that existed when it started, so a newer integration won't be available until you **destroy** the existing runtime and start a new one.
## Adapt this guide with AI
This section provides instructions for using AI tools to adapt this guide to your own environment.
The following prompts are designed for use with **Claude Code, Codex, or the Wherobots VS Code Extension** with the Wherobots MCP server enabled.
For optimal results, ensure that the Wherobots MCP server and/or VS Code extension are installed and active before execution. For more information, see [Get Started with Agentic Development in Wherobots](/develop/agentic-tools).
1. Click the v button at the top-right corner of this page (next to Copy page) to open the contextual menu for AI tools.
2. Load this page into your AI tool of choice (VS Code, Claude Code, Codex, etc.). This works for any Wherobots documentation page.
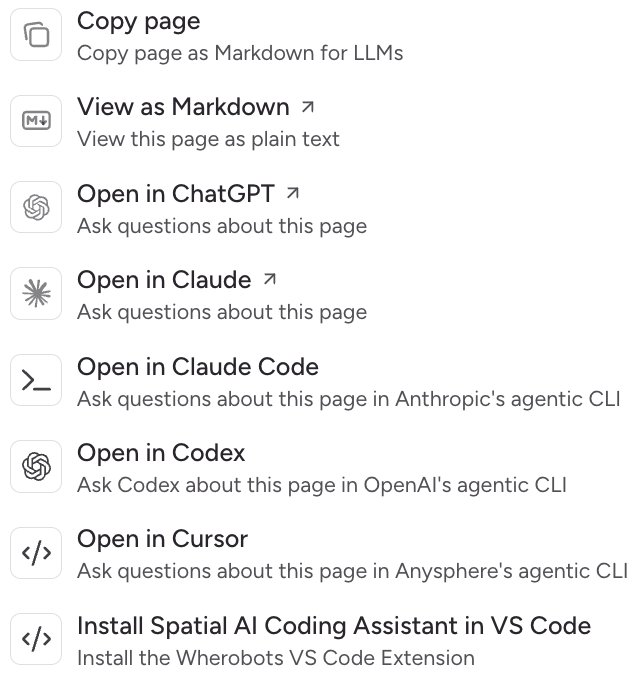 3. Open the dropdown to do either of the following:
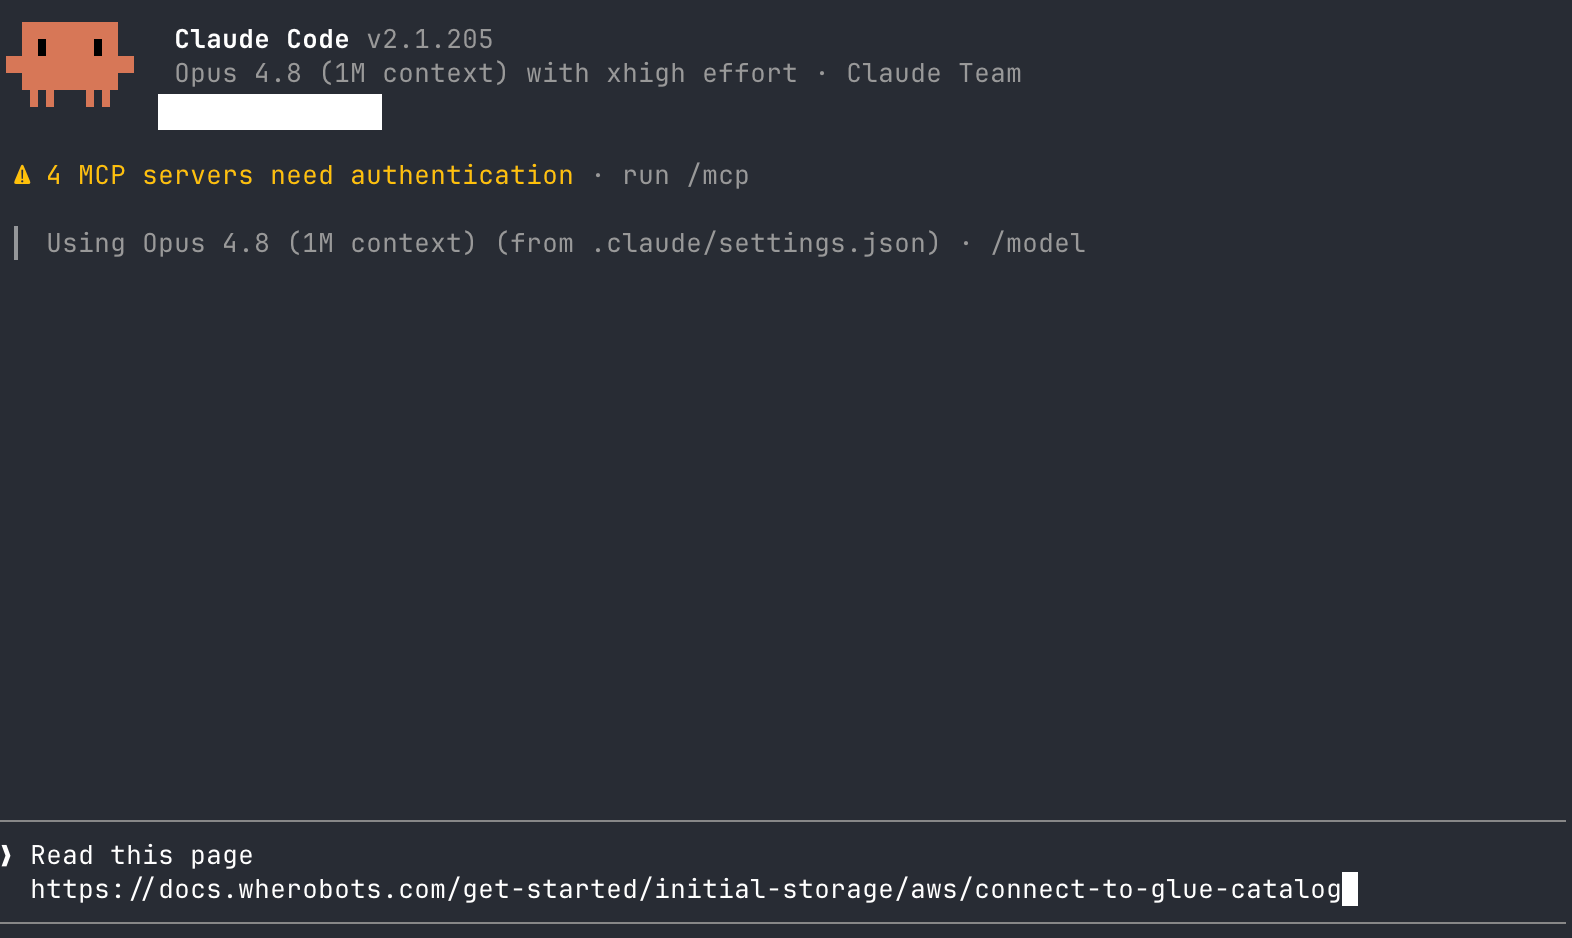
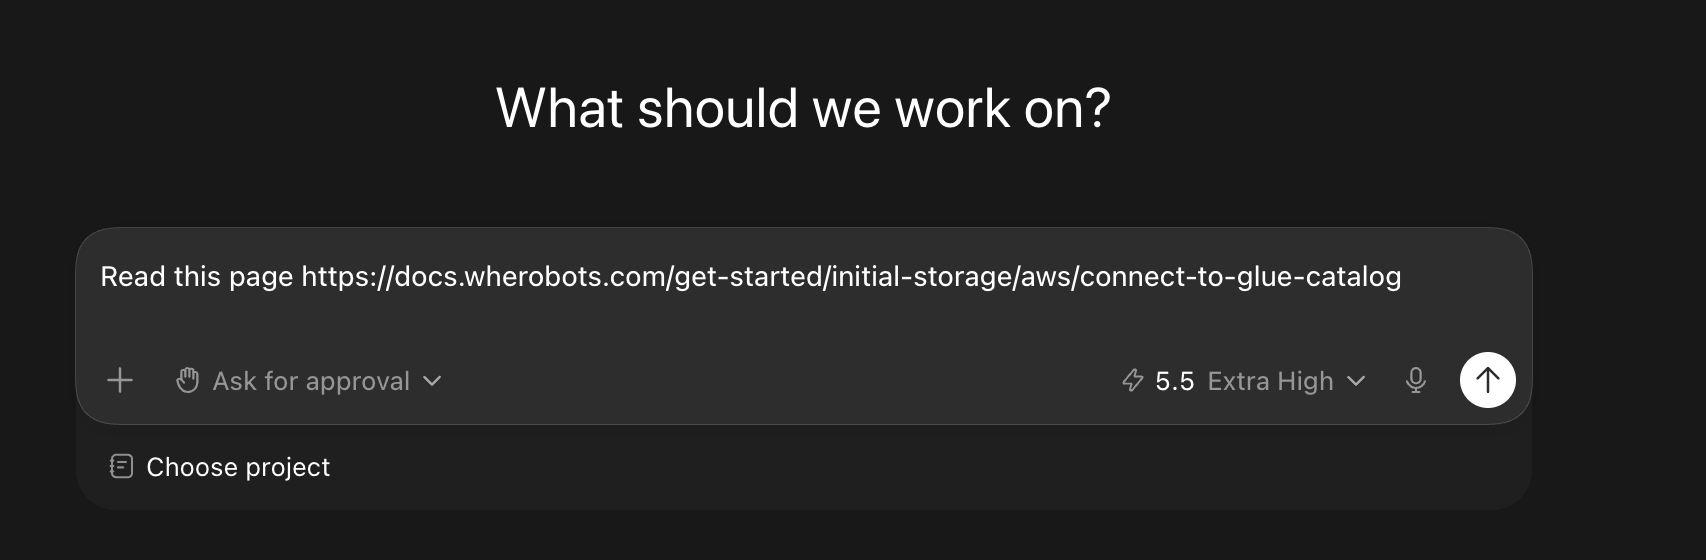
* **Open in Claude Code** or **Open in Codex**: Start a conversation preloaded telling the model to read this page, then add your own prompt that includes a scenario or question specific to your environment.
3. Open the dropdown to do either of the following:
* **Open in Claude Code** or **Open in Codex**: Start a conversation preloaded telling the model to read this page, then add your own prompt that includes a scenario or question specific to your environment.
 ### Example prompt
Success of the following prompts **requires** that you completed the [Connect to Amazon S3 Tables Catalog](/get-started/initial-storage/aws/connect-to-s3-tables-catalog) guide and have an S3 Tables catalog connection in [**Data Hub**](https://cloud.wherobots.com/data-hub).
Once the page is loaded into an LLM or AI tool, include your values in a prompt like the following to get a runnable notebook for your S3 Tables catalog:
#### Notebook generation prompt
The following prompt can be used to generate a runnable notebook. Make sure to adapt this prompt's variables and goals to your own values.
```text wrap theme={"system"}
My variable values are the following:
`CATALOG_NAME` = ""
`DB_NAME` = ""
`TABLE_NAME` = ""
`SOURCE_FILE` = "s3:////.csv"
Using the S3 Tables example on this page, fill in the placeholder variables and return a complete `.ipynb` file that I can run in Wherobots Cloud.
The notebook should read the source file, , and write the result to a new Iceberg table in the S3 table bucket.
```
## Referencing S3 Tables in a notebook
Reference tables with the fully qualified name `CATALOG_NAME.DATABASE_NAME.TABLE_NAME`, where `CATALOG_NAME` is the name you gave the catalog in Data Hub and `DATABASE_NAME` is the S3 Tables namespace:
```python theme={"system"}
df = sedona.sql("SELECT * FROM my_s3_tables_catalog.my_namespace.my_table LIMIT 10")
df.show()
```
If your catalog name contains anything other than letters, numbers, or underscores — such as a space, dash, or period — wrap it in backticks wherever you reference it. For example, a catalog named `My-Catalog` is referenced as `` `My-Catalog`.namespace.table ``.
## Example: Querying an S3 Tables-backed Iceberg table in a notebook
This section details an end-to-end example of connecting, transforming, writing, and validating data in an S3 Tables-backed Iceberg table from a notebook.
At a high level, the following example code does 3 main things:
* Creates a Sedona/Spark session. Your S3 Tables catalog is already registered by Wherobots, so no Iceberg or authentication configuration is needed.
* Runs a small ETL flow on a Comma-separated values (CSV) file in S3: reading data, normalizing column names, trimming text, and removing duplicates.
* Writes the result to an Iceberg table in your S3 table bucket, then verifies the write by selecting sample rows and checking file formats.
Unlike a general purpose S3 bucket, a table bucket manages storage for its Iceberg tables. There's no warehouse path to configure and no `LOCATION` clause on `CREATE TABLE` — S3 Tables places the data and metadata for you.
### Set your variables and create a Sedona session
The following code imports libraries that are used in the example, sets variables for your S3 Tables catalog and source data, and creates a Sedona session.
Swap the placeholder values for your own before running the cell.
The catalog name you chose when you connected your S3 table bucket in Data Hub.
Click on the catalog you created in the [Connect to Amazon S3 Tables Catalog](https://cloud.wherobots.com/data-hub) step. Copy the catalog name from the **Data Hub** interface.
The S3 Tables namespace you want to use.
This is a name you can choose at the time of running this notebook if the namespace doesn't already exist in your table bucket.
The table you want to create.
This is a name you can choose at the time of running this notebook if the table doesn't already exist in your namespace.
The S3 path to the file you want to load.
`s3://BUCKET/SUBFOLDER/file.csv` would be an example of a valid path to a CSV file.
```python wrap title="Set variables and create a Sedona session" theme={"system"}
import re
from sedona.spark import *
from pyspark.sql import functions as F
# ----------------------------------------------------------------------
# Customer configuration
# ----------------------------------------------------------------------
CATALOG_NAME = "YOUR_CATALOG_NAME" # S3 Tables catalog name from Data Hub
DB_NAME = "YOUR_DB_NAME" # S3 Tables namespace
TABLE_NAME = "YOUR_TABLE_NAME"
SOURCE_FILE = "s3://YOUR_BUCKET/YOUR_FILE.csv"
OUT_TABLE = f"{CATALOG_NAME}.{DB_NAME}.{TABLE_NAME}"
# ----------------------------------------------------------------------
# Create Sedona / Spark session and select the namespace
# ----------------------------------------------------------------------
# Your S3 Tables catalog is registered by Wherobots when you connect it in
# Data Hub and start a new runtime, so no catalog config is needed here. Use
# the fully qualified CATALOG_NAME.DB_NAME so statements route to the catalog.
# The table bucket manages storage, so there is no warehouse path to set.
config = SedonaContext.builder().getOrCreate()
sedona = SedonaContext.create(config)
sedona.sql(f"CREATE NAMESPACE IF NOT EXISTS {CATALOG_NAME}.{DB_NAME}")
sedona.sql(f"USE {CATALOG_NAME}.{DB_NAME}")
```
Once you've connected your S3 table bucket in Data Hub, Wherobots handles the Iceberg, authentication, and storage configuration for you. A standard `SedonaContext` can query the catalog like any other Wherobots catalog — reference its tables as `CATALOG_NAME.DATABASE_NAME.TABLE_NAME`.
### Basic ETL and writing the table
The following code reads the source file, cleans it, and writes the result to a new Iceberg table in your S3 table bucket.
1. **Reads the file** as CSV with a header row and an inferred schema.
2. **Normalizes column names** with `normalize_col_name` (lowercase, non-alphanumeric characters replaced with `_`) and `make_unique_col_names` (adds a numeric suffix when two columns normalize to the same name) so the names are safe for Iceberg.
3. **Cleans the rows** by trimming whitespace from string columns and dropping exact duplicate rows.
4. **Adds lineage columns** `_source_file` and `_ingested_at` so each row records where it came from and when it was loaded.
5. **Creates the Iceberg table**, then inserts the data. No `LOCATION` is specified — the table bucket manages storage.
6. **Verifies the result** by selecting a few rows and checking the physical data file format.
```python wrap title="Normalize, clean, and write the source data" theme={"system"}
# --------------------------------------------
# Read source CSV
# --------------------------------------------
raw_df = (
sedona.read
.option("header", True)
.option("inferSchema", True)
.csv(SOURCE_FILE)
)
# --------------------------------------------
# Basic ETL: normalize column names, trim text,
# and drop duplicates
# --------------------------------------------
def normalize_col_name(name: str) -> str:
cleaned = re.sub(r"[^A-Za-z0-9_]", "_", name.strip().lower())
cleaned = re.sub(r"_+", "_", cleaned).strip("_")
return cleaned or "col"
def make_unique_col_names(cols):
seen = {}
output = []
for col in cols:
base = normalize_col_name(col)
count = seen.get(base, 0)
if count == 0:
output.append(base)
else:
output.append(f"{base}_{count + 1}")
seen[base] = count + 1
return output
renamed_df = raw_df.toDF(*make_unique_col_names(raw_df.columns))
string_cols = {
col_name
for col_name, dtype_name in renamed_df.dtypes
if dtype_name == "string"
}
clean_df = (
renamed_df
.select(
*[
F.trim(F.col(c)).alias(c) if c in string_cols else F.col(c)
for c in renamed_df.columns
]
)
.dropDuplicates()
.withColumn("_source_file", F.lit(SOURCE_FILE))
.withColumn("_ingested_at", F.current_timestamp())
)
# --------------------------------------------
# Create Iceberg table, then insert data
# --------------------------------------------
# S3 Tables manages storage for the table bucket, so no LOCATION is set.
def quote_identifier(name: str) -> str:
return f"`{name.replace('`', '``')}`"
columns_sql = ",\n ".join(
f"{quote_identifier(field.name)} {field.dataType.simpleString()}"
for field in clean_df.schema.fields
)
select_sql = ",\n ".join(
quote_identifier(field.name)
for field in clean_df.schema.fields
)
clean_df.createOrReplaceTempView("clean_source_data")
sedona.sql(f"DROP TABLE IF EXISTS {OUT_TABLE}")
sedona.sql(f"""
CREATE TABLE {OUT_TABLE} (
{columns_sql}
)
USING iceberg
""")
sedona.sql(f"""
INSERT INTO {OUT_TABLE}
SELECT
{select_sql}
FROM clean_source_data
""")
# --------------------------------------------
# Verify table
# --------------------------------------------
sedona.sql(f"SELECT * FROM {OUT_TABLE} LIMIT 10").show(truncate=False)
sedona.sql(f"""
SELECT
file_format,
COUNT(*) AS file_count
FROM {OUT_TABLE}.files
GROUP BY file_format
""").show(truncate=False)
```
### Example prompt
Success of the following prompts **requires** that you completed the [Connect to Amazon S3 Tables Catalog](/get-started/initial-storage/aws/connect-to-s3-tables-catalog) guide and have an S3 Tables catalog connection in [**Data Hub**](https://cloud.wherobots.com/data-hub).
Once the page is loaded into an LLM or AI tool, include your values in a prompt like the following to get a runnable notebook for your S3 Tables catalog:
#### Notebook generation prompt
The following prompt can be used to generate a runnable notebook. Make sure to adapt this prompt's variables and goals to your own values.
```text wrap theme={"system"}
My variable values are the following:
`CATALOG_NAME` = ""
`DB_NAME` = ""
`TABLE_NAME` = ""
`SOURCE_FILE` = "s3:////.csv"
Using the S3 Tables example on this page, fill in the placeholder variables and return a complete `.ipynb` file that I can run in Wherobots Cloud.
The notebook should read the source file, , and write the result to a new Iceberg table in the S3 table bucket.
```
## Referencing S3 Tables in a notebook
Reference tables with the fully qualified name `CATALOG_NAME.DATABASE_NAME.TABLE_NAME`, where `CATALOG_NAME` is the name you gave the catalog in Data Hub and `DATABASE_NAME` is the S3 Tables namespace:
```python theme={"system"}
df = sedona.sql("SELECT * FROM my_s3_tables_catalog.my_namespace.my_table LIMIT 10")
df.show()
```
If your catalog name contains anything other than letters, numbers, or underscores — such as a space, dash, or period — wrap it in backticks wherever you reference it. For example, a catalog named `My-Catalog` is referenced as `` `My-Catalog`.namespace.table ``.
## Example: Querying an S3 Tables-backed Iceberg table in a notebook
This section details an end-to-end example of connecting, transforming, writing, and validating data in an S3 Tables-backed Iceberg table from a notebook.
At a high level, the following example code does 3 main things:
* Creates a Sedona/Spark session. Your S3 Tables catalog is already registered by Wherobots, so no Iceberg or authentication configuration is needed.
* Runs a small ETL flow on a Comma-separated values (CSV) file in S3: reading data, normalizing column names, trimming text, and removing duplicates.
* Writes the result to an Iceberg table in your S3 table bucket, then verifies the write by selecting sample rows and checking file formats.
Unlike a general purpose S3 bucket, a table bucket manages storage for its Iceberg tables. There's no warehouse path to configure and no `LOCATION` clause on `CREATE TABLE` — S3 Tables places the data and metadata for you.
### Set your variables and create a Sedona session
The following code imports libraries that are used in the example, sets variables for your S3 Tables catalog and source data, and creates a Sedona session.
Swap the placeholder values for your own before running the cell.
The catalog name you chose when you connected your S3 table bucket in Data Hub.
Click on the catalog you created in the [Connect to Amazon S3 Tables Catalog](https://cloud.wherobots.com/data-hub) step. Copy the catalog name from the **Data Hub** interface.
The S3 Tables namespace you want to use.
This is a name you can choose at the time of running this notebook if the namespace doesn't already exist in your table bucket.
The table you want to create.
This is a name you can choose at the time of running this notebook if the table doesn't already exist in your namespace.
The S3 path to the file you want to load.
`s3://BUCKET/SUBFOLDER/file.csv` would be an example of a valid path to a CSV file.
```python wrap title="Set variables and create a Sedona session" theme={"system"}
import re
from sedona.spark import *
from pyspark.sql import functions as F
# ----------------------------------------------------------------------
# Customer configuration
# ----------------------------------------------------------------------
CATALOG_NAME = "YOUR_CATALOG_NAME" # S3 Tables catalog name from Data Hub
DB_NAME = "YOUR_DB_NAME" # S3 Tables namespace
TABLE_NAME = "YOUR_TABLE_NAME"
SOURCE_FILE = "s3://YOUR_BUCKET/YOUR_FILE.csv"
OUT_TABLE = f"{CATALOG_NAME}.{DB_NAME}.{TABLE_NAME}"
# ----------------------------------------------------------------------
# Create Sedona / Spark session and select the namespace
# ----------------------------------------------------------------------
# Your S3 Tables catalog is registered by Wherobots when you connect it in
# Data Hub and start a new runtime, so no catalog config is needed here. Use
# the fully qualified CATALOG_NAME.DB_NAME so statements route to the catalog.
# The table bucket manages storage, so there is no warehouse path to set.
config = SedonaContext.builder().getOrCreate()
sedona = SedonaContext.create(config)
sedona.sql(f"CREATE NAMESPACE IF NOT EXISTS {CATALOG_NAME}.{DB_NAME}")
sedona.sql(f"USE {CATALOG_NAME}.{DB_NAME}")
```
Once you've connected your S3 table bucket in Data Hub, Wherobots handles the Iceberg, authentication, and storage configuration for you. A standard `SedonaContext` can query the catalog like any other Wherobots catalog — reference its tables as `CATALOG_NAME.DATABASE_NAME.TABLE_NAME`.
### Basic ETL and writing the table
The following code reads the source file, cleans it, and writes the result to a new Iceberg table in your S3 table bucket.
1. **Reads the file** as CSV with a header row and an inferred schema.
2. **Normalizes column names** with `normalize_col_name` (lowercase, non-alphanumeric characters replaced with `_`) and `make_unique_col_names` (adds a numeric suffix when two columns normalize to the same name) so the names are safe for Iceberg.
3. **Cleans the rows** by trimming whitespace from string columns and dropping exact duplicate rows.
4. **Adds lineage columns** `_source_file` and `_ingested_at` so each row records where it came from and when it was loaded.
5. **Creates the Iceberg table**, then inserts the data. No `LOCATION` is specified — the table bucket manages storage.
6. **Verifies the result** by selecting a few rows and checking the physical data file format.
```python wrap title="Normalize, clean, and write the source data" theme={"system"}
# --------------------------------------------
# Read source CSV
# --------------------------------------------
raw_df = (
sedona.read
.option("header", True)
.option("inferSchema", True)
.csv(SOURCE_FILE)
)
# --------------------------------------------
# Basic ETL: normalize column names, trim text,
# and drop duplicates
# --------------------------------------------
def normalize_col_name(name: str) -> str:
cleaned = re.sub(r"[^A-Za-z0-9_]", "_", name.strip().lower())
cleaned = re.sub(r"_+", "_", cleaned).strip("_")
return cleaned or "col"
def make_unique_col_names(cols):
seen = {}
output = []
for col in cols:
base = normalize_col_name(col)
count = seen.get(base, 0)
if count == 0:
output.append(base)
else:
output.append(f"{base}_{count + 1}")
seen[base] = count + 1
return output
renamed_df = raw_df.toDF(*make_unique_col_names(raw_df.columns))
string_cols = {
col_name
for col_name, dtype_name in renamed_df.dtypes
if dtype_name == "string"
}
clean_df = (
renamed_df
.select(
*[
F.trim(F.col(c)).alias(c) if c in string_cols else F.col(c)
for c in renamed_df.columns
]
)
.dropDuplicates()
.withColumn("_source_file", F.lit(SOURCE_FILE))
.withColumn("_ingested_at", F.current_timestamp())
)
# --------------------------------------------
# Create Iceberg table, then insert data
# --------------------------------------------
# S3 Tables manages storage for the table bucket, so no LOCATION is set.
def quote_identifier(name: str) -> str:
return f"`{name.replace('`', '``')}`"
columns_sql = ",\n ".join(
f"{quote_identifier(field.name)} {field.dataType.simpleString()}"
for field in clean_df.schema.fields
)
select_sql = ",\n ".join(
quote_identifier(field.name)
for field in clean_df.schema.fields
)
clean_df.createOrReplaceTempView("clean_source_data")
sedona.sql(f"DROP TABLE IF EXISTS {OUT_TABLE}")
sedona.sql(f"""
CREATE TABLE {OUT_TABLE} (
{columns_sql}
)
USING iceberg
""")
sedona.sql(f"""
INSERT INTO {OUT_TABLE}
SELECT
{select_sql}
FROM clean_source_data
""")
# --------------------------------------------
# Verify table
# --------------------------------------------
sedona.sql(f"SELECT * FROM {OUT_TABLE} LIMIT 10").show(truncate=False)
sedona.sql(f"""
SELECT
file_format,
COUNT(*) AS file_count
FROM {OUT_TABLE}.files
GROUP BY file_format
""").show(truncate=False)
```