> ## Documentation Index
> Fetch the complete documentation index at: https://docs.wherobots.com/llms.txt
> Use this file to discover all available pages before exploring further.
# S3 Storage Integration
> Integrate Amazon S3 with Wherobots to leverage S3 for data storage while using Wherobots as the spatial engine.
Wherobots' integration with Amazon Simple Storage Service (S3) allows Amazon S3 customers to utilize Wherobots as the spatial engine that operates on their data while still using Amazon S3 for data storage.
Accelerate your creation of spatial data products by using data directly from Amazon S3 public or private buckets, bypassing the need for time-consuming data transfers.
What you need before starting
Step-by-step setup
Create catalogs from S3
## Benefits
* **Ease of access to data:** Integrating your S3 buckets allows Wherobots Organization members to seamlessly access and work with data stored in Amazon S3 buckets without having to manually transfer or duplicate the data.
* **Self-service setup:** Administrators can configure the integration themselves through a user interface.
* **Secure authentication:** Wherobots' S3 integration supports secure authentication methods, including Amazon Web Services (AWS) access keys and AWS Identity and Access Management (IAM) role-based access.
* **Control data access:** Administrators can select specific buckets to be accessed through the integration, providing granular control over data access.
* **Supports Requester Pays buckets:** Wherobots' S3 integration supports integrations with Amazon S3 Requester Pays buckets. For more information, see [Using Requester Pays buckets for storage transfers and usage](https://docs.aws.amazon.com/AmazonS3/latest/userguide/RequesterPaysBuckets.html) in the Amazon S3 documentation.
## Before you start
* **Admin** account within a **Professional**, **Innovation**, or **Enterprise** Edition Organization
Wherobots Organization members with the **User** role accounts can use existing integrations set up by Admins but cannot create new ones. See [Organization Roles](/get-started/organization-info/organization-roles/).
* Community Edition is not supported. See [Organization Editions](/get-started/organization-management/organization-editions) or [Upgrade Organization](/get-started/upgrade-organization/)
* An AWS account
* An IAM role with permissions to modify trust and role policies (or permissions to create one). This role will be used by Wherobots to access your S3 bucket.
The following IAM Actions are needed to create or manage IAM roles in AWS. These typically require `AdministratorAccess`.
| IAM Action | Description |
| ------------------------ | ----------------------------------------------------------- |
| `AttachRolePolicy` | Attaches a managed policy to the role |
| `CreateRole` | Creates a new IAM role |
| `DeleteRolePolicy` | Removes an inline policy from the role |
| `DetachRolePolicy` | Detaches a managed policy from the role |
| `PutRolePolicy` | Creates a new inline policy and attaches it to the role |
| `UpdateAssumeRolePolicy` | Modifies the trust policy of the role |
| `UpdateRole` | Modifies the role's description or maximum session duration |
For a complete list of IAM Actions, see [Actions defined by AWS Identity and Access Management](https://docs.aws.amazon.com/service-authorization/latest/reference/list_awsidentityandaccessmanagementiam.html#awsidentityandaccessmanagementiam-actions-as-permissions) in the AWS Documentation.
* An existing public or private AWS S3 bucket
## Bucket types
The following Amazon S3 bucket types can be integrated with Wherobots:
A public bucket on Amazon S3 is a bucket that has turned off Amazon S3's default **Block all public access** option.
Granting external write access to a public S3 bucket is strongly discouraged. Use a private bucket for Managed Catalogs.
A private bucket on Amazon S3 is a bucket that keeps the default **Block all public access** option enabled. This is the recommended option for Managed Catalogs.
In Amazon S3, a Requester Pays bucket shifts the responsibility for the cost of the request and the data download from the bucket owner to the person accessing the data.
**Additional fees apply**
Accessing data from Requester Pays buckets will result in additional fees charged to you, not the bucket owner.
For more information on Amazon S3 buckets, see [Creating a bucket](https://docs.aws.amazon.com/AmazonS3/latest/userguide/create-bucket-overview.html) in the Amazon S3 documentation.
## Integrate a public or private bucket
This integration requires switching between **Wherobots Cloud** and **AWS Console**. We recommend opening both in separate browser tabs and following the workflow below.
### Integration workflow
This integration involves configuring an IAM role in AWS and setting up the storage integration in Wherobots Cloud.
Complete these steps in order, switching between platforms as indicated:
1. **Wherobots Cloud:** Start the integration and copy policy JSON (Steps 1-3)
2. **AWS Console:** Configure your IAM role with the copied policies
3. **Wherobots Cloud:** Submit and verify the integration (Step 4)
**S3 Path Restriction:** Bucket paths cannot contain periods. For example, `s3://my.bucket.name` is not allowed. Acceptable paths can consist of alphanumeric characters, underscores, equal signs, and dashes.
1. Log in to [Wherobots Cloud](https://cloud.wherobots.com)
2. Click [**Storage**](https://cloud.wherobots.com/storage)
3. Click **Create Storage Integration**
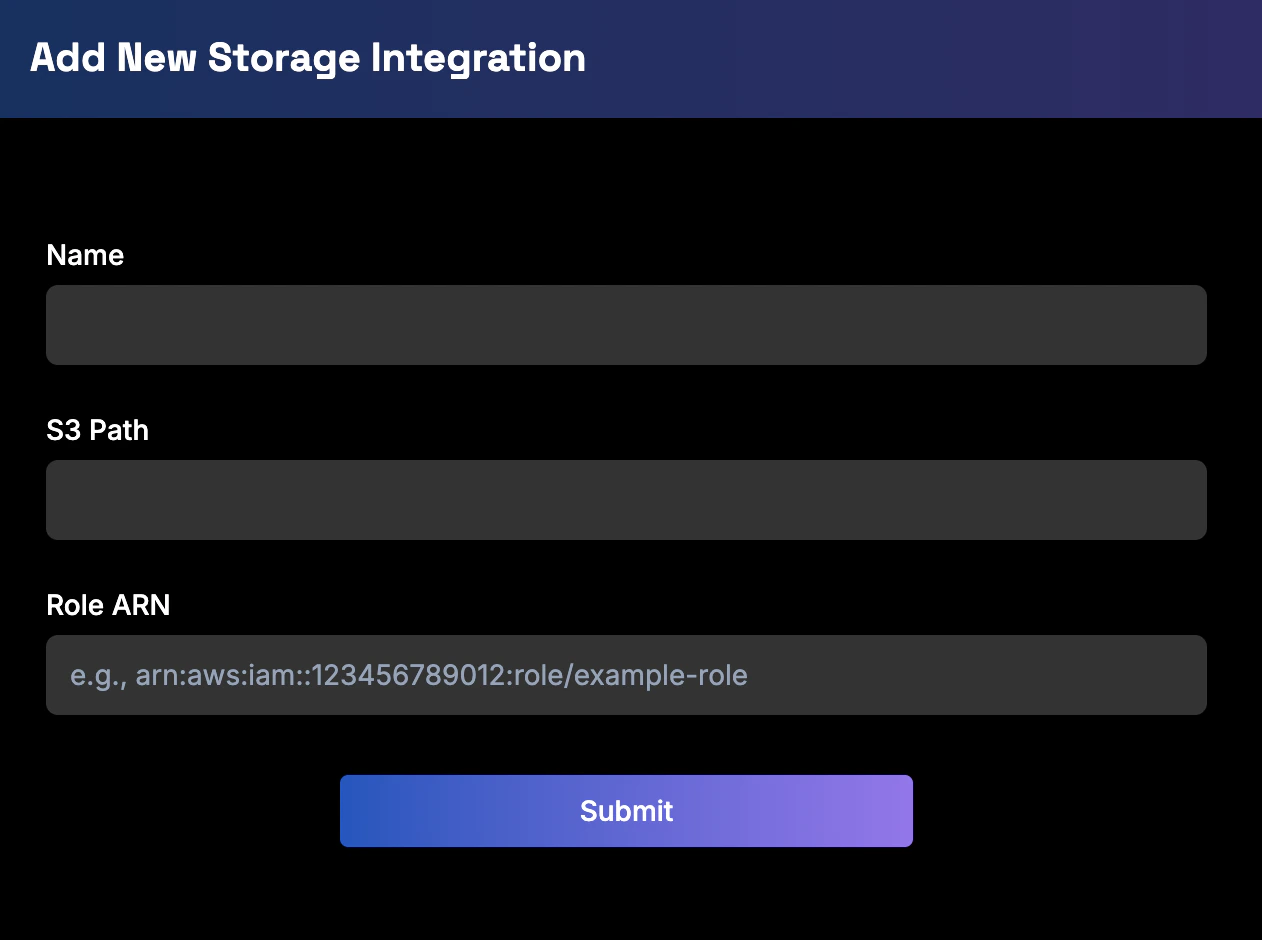
 On the **Add New Storage Integration** page, enter the following:
* **Name**: Alphanumeric characters, spaces, special characters, or underscores (must include at least one letter)
* **S3 Path**: Your bucket path prefaced by `s3://` (e.g., `s3://my-bucket-name`)
* **Role ARN**: Your IAM role's Amazon Resource Name
**Don't have a Role ARN yet?** You'll get this from AWS. For now, keep this page open and switch to the [**AWS Console**](#aws-console) tab to create or find your IAM role.
On the **Add New Storage Integration** page, enter the following:
* **Name**: Alphanumeric characters, spaces, special characters, or underscores (must include at least one letter)
* **S3 Path**: Your bucket path prefaced by `s3://` (e.g., `s3://my-bucket-name`)
* **Role ARN**: Your IAM role's Amazon Resource Name
**Don't have a Role ARN yet?** You'll get this from AWS. For now, keep this page open and switch to the [**AWS Console**](#aws-console) tab to create or find your IAM role.
 **Allowed access locations (BYOC Organizations only)**
If your Organization has [Bring Your Own Cloud (BYOC)](/develop/storage-management/byoc) enabled, the form shows an **Allowed access locations** section. Use it to choose which AWS accounts are allowed to access this storage integration:
* **Wherobots Cloud** — the Wherobots Hosted platform.
* **`aws--` (BYOC)** — your BYOC region, with its AWS **Account ID** shown beneath it. One checkbox appears per enabled BYOC region.
Both locations are selected by default. The **Trust Relationship** JSON updates to match your selection, so finalize your access locations *before* you copy it in the next step.
**Allowed access locations (BYOC Organizations only)**
If your Organization has [Bring Your Own Cloud (BYOC)](/develop/storage-management/byoc) enabled, the form shows an **Allowed access locations** section. Use it to choose which AWS accounts are allowed to access this storage integration:
* **Wherobots Cloud** — the Wherobots Hosted platform.
* **`aws--` (BYOC)** — your BYOC region, with its AWS **Account ID** shown beneath it. One checkbox appears per enabled BYOC region.
Both locations are selected by default. The **Trust Relationship** JSON updates to match your selection, so finalize your access locations *before* you copy it in the next step.
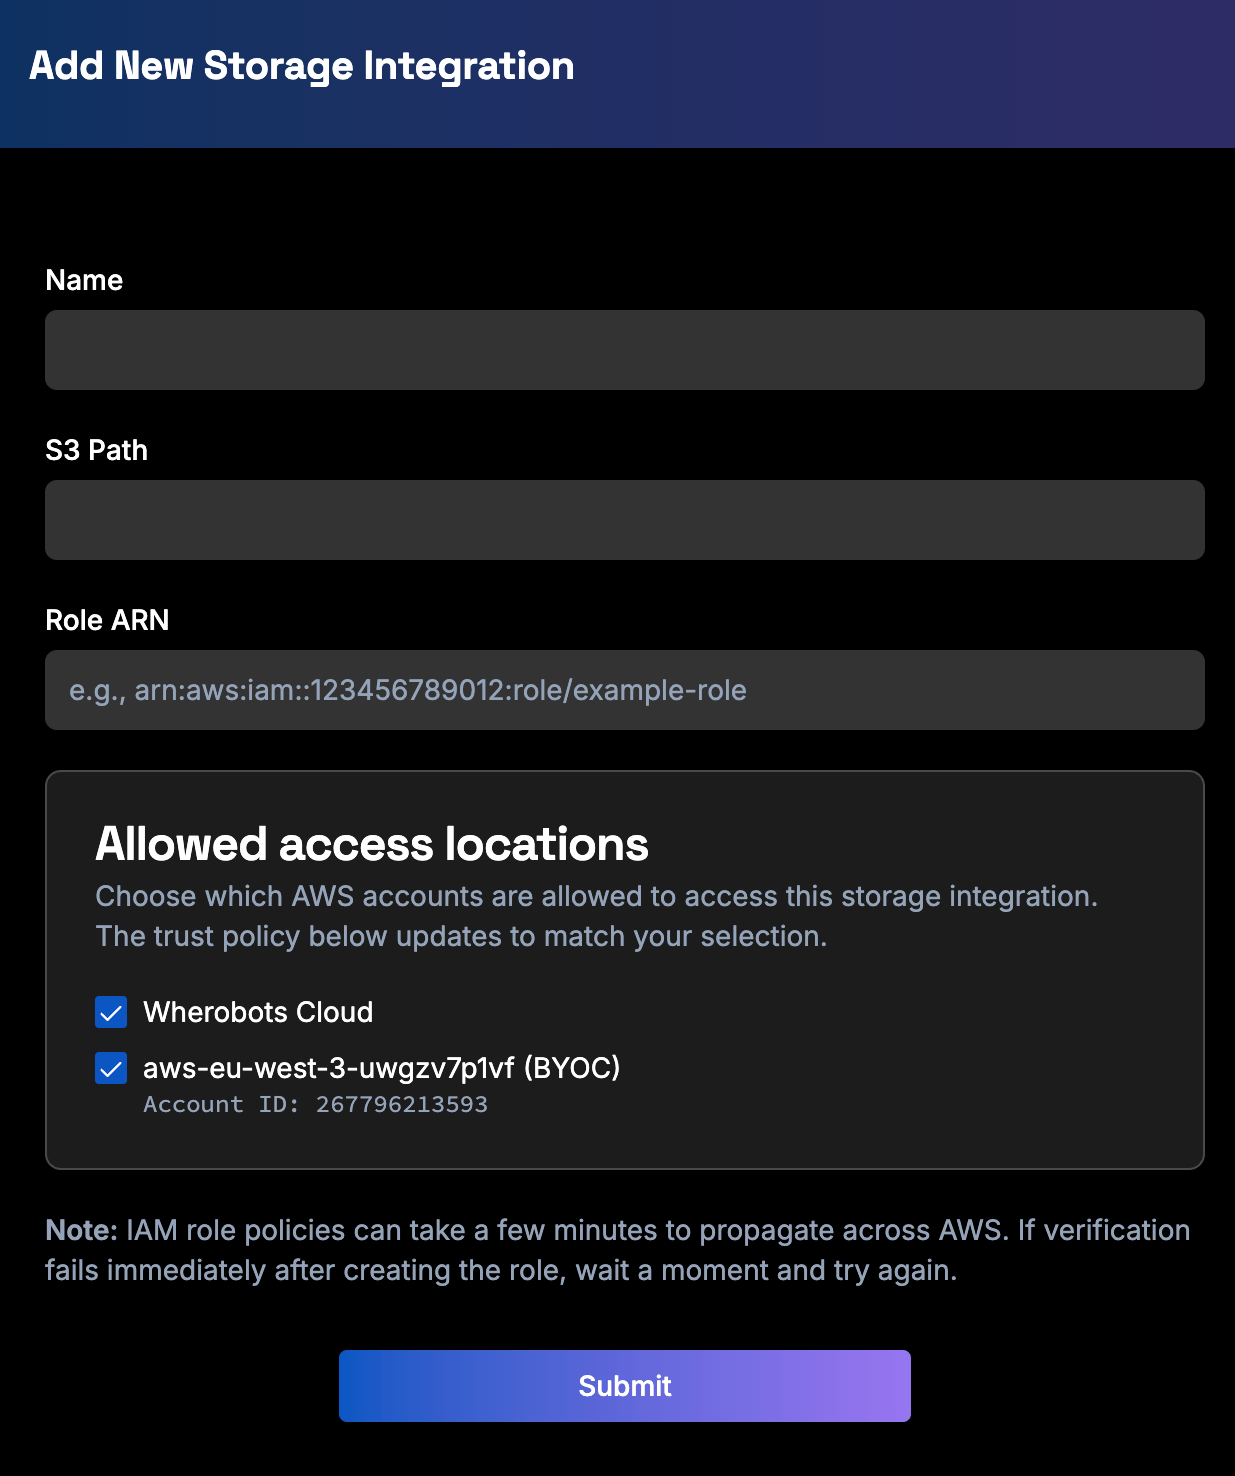 To restrict a bucket so the Wherobots Hosted platform cannot reach it, select **only** your BYOC region and clear **Wherobots Cloud**. See [Data isolation & access boundaries](/develop/storage-management/byoc#data-isolation-and-access-boundaries).
Copy both the **Sample Role Policy** and **Trust Relationship** JSON from this page. You'll need these in the next step.
**BYOC Organizations:** The **Trust Relationship** JSON reflects the **Allowed access locations** you selected above. If you change your selection, re-copy the updated JSON.
To restrict a bucket so the Wherobots Hosted platform cannot reach it, select **only** your BYOC region and clear **Wherobots Cloud**. See [Data isolation & access boundaries](/develop/storage-management/byoc#data-isolation-and-access-boundaries).
Copy both the **Sample Role Policy** and **Trust Relationship** JSON from this page. You'll need these in the next step.
**BYOC Organizations:** The **Trust Relationship** JSON reflects the **Allowed access locations** you selected above. If you change your selection, re-copy the updated JSON.
 **Next: Switch to AWS Console**
Switch to the **AWS Console** tab above to configure your IAM role with these policies. Return here after completing the AWS configuration.
**Returning from AWS?**
After completing the IAM role configuration in AWS, return here to finish the integration.
1. Click **Submit** on the Create Storage Integration page
2. You'll be taken to **Organization Settings** — scroll to [**Storage**](https://cloud.wherobots.com/organization#storage)
3. Find your bucket and click **... > Verify Access**
**Next: Switch to AWS Console**
Switch to the **AWS Console** tab above to configure your IAM role with these policies. Return here after completing the AWS configuration.
**Returning from AWS?**
After completing the IAM role configuration in AWS, return here to finish the integration.
1. Click **Submit** on the Create Storage Integration page
2. You'll be taken to **Organization Settings** — scroll to [**Storage**](https://cloud.wherobots.com/organization#storage)
3. Find your bucket and click **... > Verify Access**
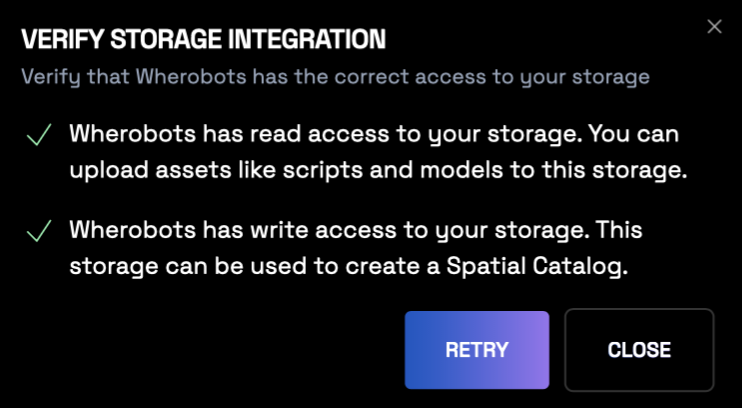 If unsuccessful, wait a few seconds and click **Retry**.
IAM role policies can take a few minutes to propagate across AWS. If verification fails immediately after creating the role, wait a moment and try again.
**Prerequisites from Wherobots Cloud**
Before starting, make sure you have:
* The **Sample Role Policy** JSON (copied from Wherobots Cloud Step 3)
* The **Trust Relationship** JSON (copied from Wherobots Cloud Step 3)
If you don't have these yet, switch to the **Wherobots Cloud** tab and complete Steps 1-3 first.
Already have an IAM role? Skip to the **Add the Wherobots tag** step.
1. Go to [AWS IAM Roles](https://console.aws.amazon.com/iam/home#/roles).
2. Click **Create role**.
3. Under **Service or use case**, choose **S3**.
4. Click **Next** through Permissions Policy.
5. Enter a descriptive **Role Name**.
6. Click **Create role**.
1. Click your newly created role.
2. Click the **Tags** tab, then **Manage tags**.
3. Click **Add new tag**. Enter the following:
* **Key**: `wherobotsOrgID`
* **Value**: Your Wherobots Organization ID (find this at [Organization Settings](https://cloud.wherobots.com/organization)).
4. Click **Save changes**.
1. Select your IAM role from the [AWS IAM Roles](https://console.aws.amazon.com/iam/home#/roles) list.
2. Copy the **Role ARN** from the Summary section.
You'll paste this Role ARN into Wherobots Cloud in the **Role ARN** field (Step 2 in the Wherobots Cloud tab).
1. Under **Permissions policies**, click **Add permissions > Create inline policy**.
2. Click **JSON** and paste the **Sample Role Policy** from Wherobots Cloud.
3. Click **Next**, name the policy, and click **Create Policy**.
If unsuccessful, wait a few seconds and click **Retry**.
IAM role policies can take a few minutes to propagate across AWS. If verification fails immediately after creating the role, wait a moment and try again.
**Prerequisites from Wherobots Cloud**
Before starting, make sure you have:
* The **Sample Role Policy** JSON (copied from Wherobots Cloud Step 3)
* The **Trust Relationship** JSON (copied from Wherobots Cloud Step 3)
If you don't have these yet, switch to the **Wherobots Cloud** tab and complete Steps 1-3 first.
Already have an IAM role? Skip to the **Add the Wherobots tag** step.
1. Go to [AWS IAM Roles](https://console.aws.amazon.com/iam/home#/roles).
2. Click **Create role**.
3. Under **Service or use case**, choose **S3**.
4. Click **Next** through Permissions Policy.
5. Enter a descriptive **Role Name**.
6. Click **Create role**.
1. Click your newly created role.
2. Click the **Tags** tab, then **Manage tags**.
3. Click **Add new tag**. Enter the following:
* **Key**: `wherobotsOrgID`
* **Value**: Your Wherobots Organization ID (find this at [Organization Settings](https://cloud.wherobots.com/organization)).
4. Click **Save changes**.
1. Select your IAM role from the [AWS IAM Roles](https://console.aws.amazon.com/iam/home#/roles) list.
2. Copy the **Role ARN** from the Summary section.
You'll paste this Role ARN into Wherobots Cloud in the **Role ARN** field (Step 2 in the Wherobots Cloud tab).
1. Under **Permissions policies**, click **Add permissions > Create inline policy**.
2. Click **JSON** and paste the **Sample Role Policy** from Wherobots Cloud.
3. Click **Next**, name the policy, and click **Create Policy**.
 1. Click the **Trust relationships** tab.
2. Click **Edit trust policy**.
3. Select all and replace with the **Trust Relationship** JSON from Wherobots Cloud.
4. Click **Update policy**.
**Next: Return to Wherobots Cloud**
AWS configuration is complete. Switch back to the **Wherobots Cloud** tab, paste the Role ARN into **Step 2**, then continue with **Step 4: Submit and verify**.
## Manage storage integrations
After creating S3 storage integrations, Admins can manage them from [**Organization Settings**](https://cloud.wherobots.com/organization).
To verify an integration, see:
[**Organization Settings** > **Storage**](https://cloud.wherobots.com/organization#general#storage)> **Click ... (The ellipsis button) > Verify Access**
To view all storage integrations, see:
[**Organization Settings** > **Storage**](https://cloud.wherobots.com/organization#general#storage)
To delete an integration, see:
[**Organization Settings** > **Storage**](https://cloud.wherobots.com/organization#general#storage)> **Click ... (The ellipsis button) > Delete**
### View a specific integration's contents
Log in to [Wherobots Cloud](https://cloud.wherobots.com/) and click [**Storage**](https://cloud.wherobots.com/storage) in the left sidebar.
1. Click the **Trust relationships** tab.
2. Click **Edit trust policy**.
3. Select all and replace with the **Trust Relationship** JSON from Wherobots Cloud.
4. Click **Update policy**.
**Next: Return to Wherobots Cloud**
AWS configuration is complete. Switch back to the **Wherobots Cloud** tab, paste the Role ARN into **Step 2**, then continue with **Step 4: Submit and verify**.
## Manage storage integrations
After creating S3 storage integrations, Admins can manage them from [**Organization Settings**](https://cloud.wherobots.com/organization).
To verify an integration, see:
[**Organization Settings** > **Storage**](https://cloud.wherobots.com/organization#general#storage)> **Click ... (The ellipsis button) > Verify Access**
To view all storage integrations, see:
[**Organization Settings** > **Storage**](https://cloud.wherobots.com/organization#general#storage)
To delete an integration, see:
[**Organization Settings** > **Storage**](https://cloud.wherobots.com/organization#general#storage)> **Click ... (The ellipsis button) > Delete**
### View a specific integration's contents
Log in to [Wherobots Cloud](https://cloud.wherobots.com/) and click [**Storage**](https://cloud.wherobots.com/storage) in the left sidebar.
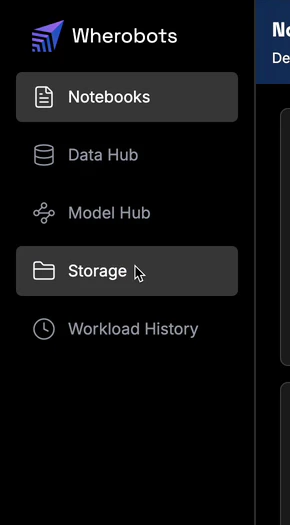 Click the storage source selector at the top of the page (shows **Managed** by default) and select your integrated bucket from the dropdown.
 Navigate through the folder structure to view your bucket's contents.
 ## Access integrated storage in a notebook
After creating a [Managed Catalog](#managed-catalog) from your S3 storage integration, access your data using the catalog reference format:
```
CATALOG_NAME.DATABASE_NAME.TABLE_NAME
```
To use new storage integrations or catalogs in your notebooks, you must start a new runtime. Notebooks can only access integrations created before the runtime started.
Log in to [Wherobots Cloud](https://cloud.wherobots.com/) and start a Notebook with a Python Kernel. See [Notebook instance management](/develop/notebook-management/notebook-instance-management/) and [Jupyter Notebook Management](/develop/notebook-management/jupyter-notebook-management/) for details.
```python sedona.table() wrap theme={"system"}
# Replace `CATALOG_NAME`, `DATABASE_NAME`, and `TABLE_NAME` with your specific names.
from sedona.spark import *
config = SedonaContext.builder().getOrCreate()
sedona = SedonaContext.create(config)
# Access data using catalog.database.table format
df = sedona.table("CATALOG_NAME.DATABASE_NAME.TABLE_NAME")
df.printSchema()
df.show()
```
```python sedona.sql() wrap theme={"system"}
# Replace `CATALOG_NAME`, `DATABASE_NAME`, and `TABLE_NAME` with your specific names.
from sedona.spark import *
config = SedonaContext.builder().getOrCreate()
sedona = SedonaContext.create(config)
# Access data using catalog.database.table format
df = sedona.sql("SELECT * FROM CATALOG_NAME.DATABASE_NAME.TABLE_NAME")
df.show()
```
## Managed Catalog
A Managed Catalog can be created from a private bucket storage integration at any time, allowing for multiple catalogs per integration.
**Use private buckets for Managed Catalogs**
Granting external write access to a public S3 bucket is strongly discouraged. Use a private S3 bucket for your Managed Catalog.
### What is a Managed Catalog?
A Managed Catalog is a metadata repository that is created, owned, and controlled directly within your Wherobots Organization.
When you connect a data source like an S3 bucket and register it as a managed catalog, Wherobots takes on the following responsibilities:
* **Source of Truth**: Wherobots becomes the authoritative source for all metadata, including schemas, table definitions, file locations, and partition information.
* **Data Discovery**: Wherobots actively scans the underlying storage (e.g., S3) to discover new data and automatically update the catalog.
* **Lifecycle Management**: Wherobots handles all metadata operations, such as creating, updating, and deleting tables. Changes in the underlying data are automatically synced to the catalog.
* **Optimization:** Because Wherobots has full control, it can build and manage advanced spatial indexes and perform other performance optimizations directly on the metadata.
You typically use a managed catalog when your raw spatial data files reside in an AWS S3 private
bucket and you want Wherobots to handle all aspects of data management, query optimization, and spatial ETL.
### Create a Managed Catalog from an S3 bucket
To create a Managed Catalog from an S3 bucket storage integration, complete the following steps:
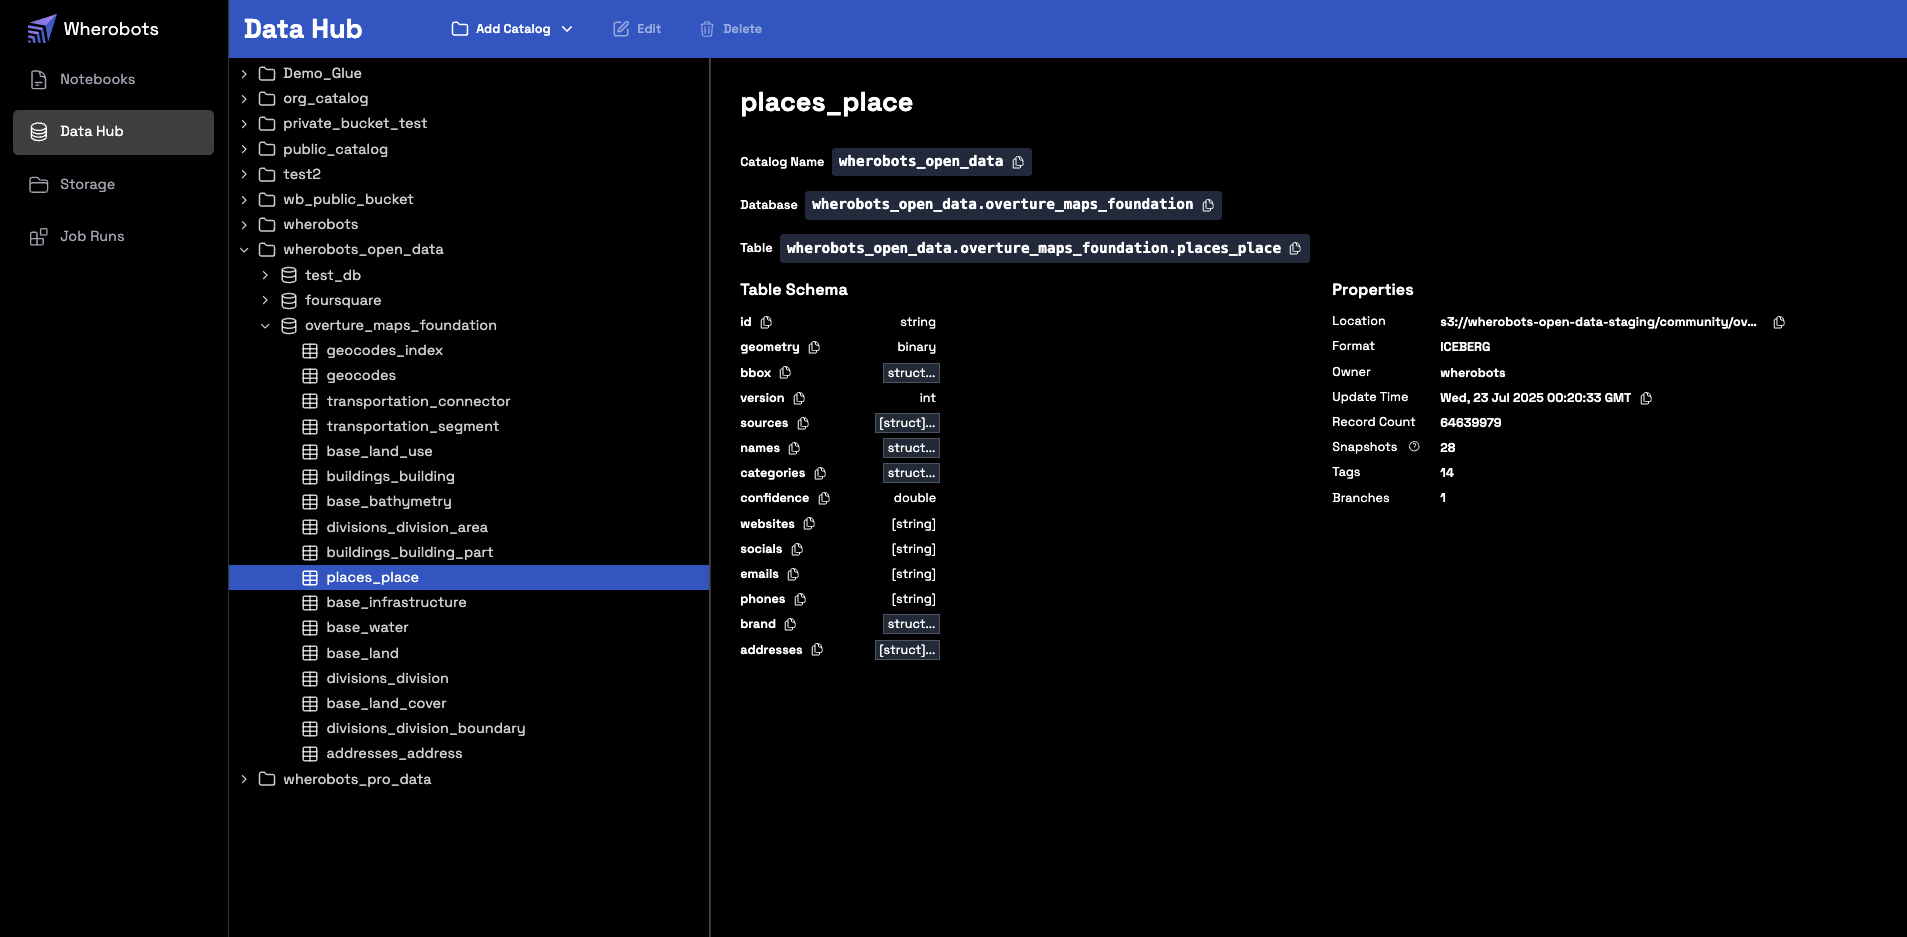
Log in to [Wherobots Cloud](https://cloud.wherobots.com/) and click [**Data Hub**](https://cloud.wherobots.com/data-hub).
Click **Add Catalog**.
## Access integrated storage in a notebook
After creating a [Managed Catalog](#managed-catalog) from your S3 storage integration, access your data using the catalog reference format:
```
CATALOG_NAME.DATABASE_NAME.TABLE_NAME
```
To use new storage integrations or catalogs in your notebooks, you must start a new runtime. Notebooks can only access integrations created before the runtime started.
Log in to [Wherobots Cloud](https://cloud.wherobots.com/) and start a Notebook with a Python Kernel. See [Notebook instance management](/develop/notebook-management/notebook-instance-management/) and [Jupyter Notebook Management](/develop/notebook-management/jupyter-notebook-management/) for details.
```python sedona.table() wrap theme={"system"}
# Replace `CATALOG_NAME`, `DATABASE_NAME`, and `TABLE_NAME` with your specific names.
from sedona.spark import *
config = SedonaContext.builder().getOrCreate()
sedona = SedonaContext.create(config)
# Access data using catalog.database.table format
df = sedona.table("CATALOG_NAME.DATABASE_NAME.TABLE_NAME")
df.printSchema()
df.show()
```
```python sedona.sql() wrap theme={"system"}
# Replace `CATALOG_NAME`, `DATABASE_NAME`, and `TABLE_NAME` with your specific names.
from sedona.spark import *
config = SedonaContext.builder().getOrCreate()
sedona = SedonaContext.create(config)
# Access data using catalog.database.table format
df = sedona.sql("SELECT * FROM CATALOG_NAME.DATABASE_NAME.TABLE_NAME")
df.show()
```
## Managed Catalog
A Managed Catalog can be created from a private bucket storage integration at any time, allowing for multiple catalogs per integration.
**Use private buckets for Managed Catalogs**
Granting external write access to a public S3 bucket is strongly discouraged. Use a private S3 bucket for your Managed Catalog.
### What is a Managed Catalog?
A Managed Catalog is a metadata repository that is created, owned, and controlled directly within your Wherobots Organization.
When you connect a data source like an S3 bucket and register it as a managed catalog, Wherobots takes on the following responsibilities:
* **Source of Truth**: Wherobots becomes the authoritative source for all metadata, including schemas, table definitions, file locations, and partition information.
* **Data Discovery**: Wherobots actively scans the underlying storage (e.g., S3) to discover new data and automatically update the catalog.
* **Lifecycle Management**: Wherobots handles all metadata operations, such as creating, updating, and deleting tables. Changes in the underlying data are automatically synced to the catalog.
* **Optimization:** Because Wherobots has full control, it can build and manage advanced spatial indexes and perform other performance optimizations directly on the metadata.
You typically use a managed catalog when your raw spatial data files reside in an AWS S3 private
bucket and you want Wherobots to handle all aspects of data management, query optimization, and spatial ETL.
### Create a Managed Catalog from an S3 bucket
To create a Managed Catalog from an S3 bucket storage integration, complete the following steps:
Log in to [Wherobots Cloud](https://cloud.wherobots.com/) and click [**Data Hub**](https://cloud.wherobots.com/data-hub).
Click **Add Catalog**.
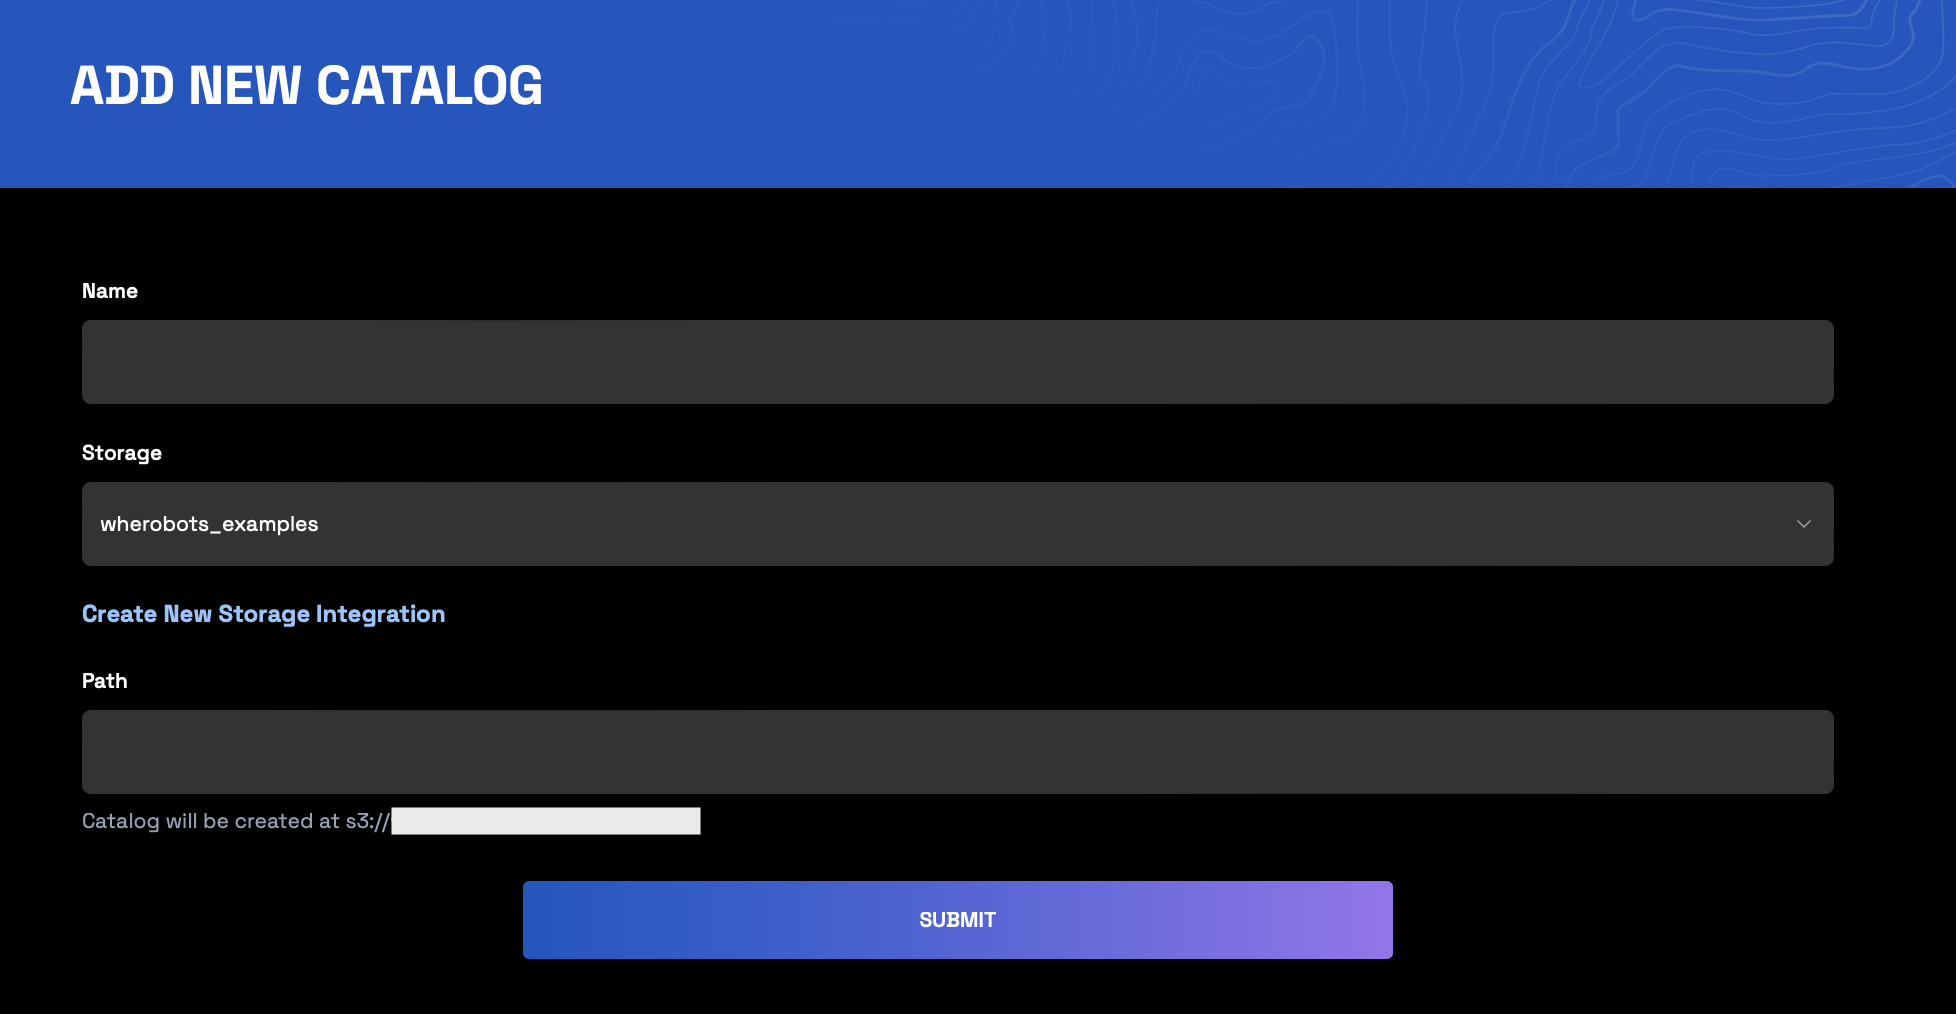
 * **Name**: Alphanumeric characters, spaces, special characters, or underscores (must include at least one letter)
* **Storage**: Select a private bucket from the dropdown
* **Path** (Optional): Enter the sub-folder where you'd like to store this Managed Catalog
* **Name**: Alphanumeric characters, spaces, special characters, or underscores (must include at least one letter)
* **Storage**: Select a private bucket from the dropdown
* **Path** (Optional): Enter the sub-folder where you'd like to store this Managed Catalog
 **Runtime Restart Required After Data Integration**
To use new storage integrations or catalogs in your notebooks, you must start a new runtime.
Notebooks can only access storage integrations or catalogs that were created before the runtime started.
## Limitations
The following limitations apply to S3 storage integrations:
* Bucket paths cannot contain periods (e.g., `s3://my.bucket.name` is not allowed)
* A bucket can only be configured with a single storage integration
* Public buckets are not recommended for Managed Catalogs due to the write access requirements
**Runtime Restart Required After Data Integration**
To use new storage integrations or catalogs in your notebooks, you must start a new runtime.
Notebooks can only access storage integrations or catalogs that were created before the runtime started.
## Limitations
The following limitations apply to S3 storage integrations:
* Bucket paths cannot contain periods (e.g., `s3://my.bucket.name` is not allowed)
* A bucket can only be configured with a single storage integration
* Public buckets are not recommended for Managed Catalogs due to the write access requirements